
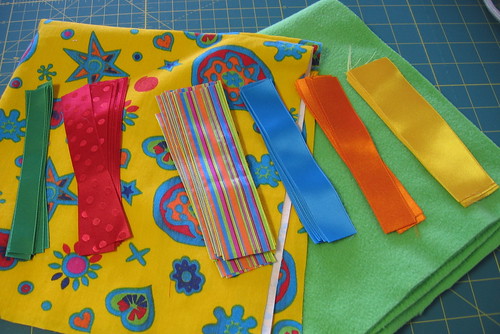
So I was at the thrift store browsing through the fabric that they sometimes have and I spotted a very bright funky piece of fabric. I asked Martijn if he thought it was unisex-ish enough for a boy gift and he said yes. Now I just needed to figure out what to do with it! I did a little brainstorming and decided it would be perfect for one of those little ribbon tag blankets. I went to my favorite store on the planet, the Smitje (a shop with every kind of crazy little sewing notion you can think of) to get some ribbon, and to the market to get a piece of fleece for the backing.
Since it was probably going to be barfed on at some point in it's life, I prewashed all the fabric and ribbons and dried them in the dryer to make sure there wouldn't be future shrinkage. I cut a 20 inch square from both the cotton and the fleece, and then cut all the ribbons I'd found into 5 inch pieces.
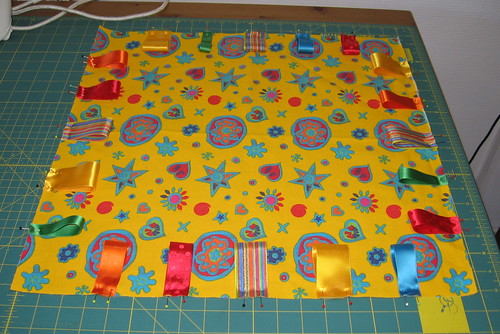
Then I folded the ribbons in half and pinned them to the right side of the cotton fabric. To make the sides somewhat even, I found the center of each edge and placed the striped ribbon exactly in the middle. I then measured two inches from either side to place the next two ribbons, and then two inches out again from there. That seemed to work pretty well, but if all of my ribbons had been as wide as the yellow one or the striped one, I might've used less ribbons per side.
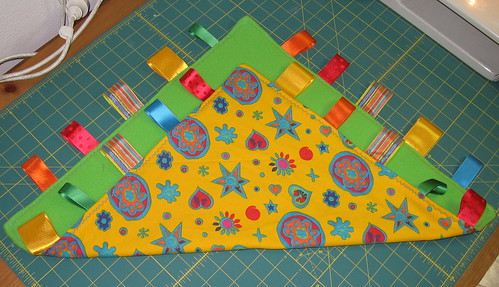
Next, just lay the fleece right side down onto your square and pin it. Stitch around the outside edges using about a 3/8" seam allowance. For extra security you can reverse over the ribbons, but I found it faster to just go around the whole thing twice. Make sure to leave an open edge for turning it right side out! Turn it right side out and poke the corners out so that they lay nice. With the bulkiness of the fleece, mine had a slightly rounded edge. Whip stitch up the hole you left to turn it right side out. Then top stitch around the outer edge. I used a decorative stitch because I could, but it's certainly not necessary.


4 comments:
I've seen these on alot of sewing blogs and yours just looks fabulous!! she is going to love this gift:) wonderful job!!!
It looks like you BOUGHT it! Amazing! I love this. And the fact you made it yourself, it will be the best gift at the party.
LOVE IT! That is so cute and colorful. You did a great job. I love making baby blankets for new babies. I have a friend who just had twins that is something to think about for her babies. Thanks for the idea!
Congrats on going to Utah in Jan!
Erika
Darling! The colors are fabulous and the little ribbons are just what little ones LOVE.
MGM
Post a Comment