Wednesday, August 27, 2008

Free AudioBooks

click the graphic to see more Works for Me Wednesday posts

We have gobs of music, but what did I REALLY want to listen on Big Daddy? Audiobooks! The problem is... I'm stingy (and I have no income). I didn't want to PAY, so I did some digging around and came up with a few good places that you might look if you are cheap and stingy (and have no income) like me ;)

  • Overdrive - You can do a search here for titles and see if your public library offers the service. Lucky for me I still have a Davis County Library card. Downside to these is they do have DRM on them and you can only "check out" the books for a limited amount of time. You -can- burn some, but not all, of these books to CD if you won't get them entirely listened to within 3 weeks.


  • NetLibrary is another website some libraries use. You need to contact your local library and see if they offer this service. Davis County Utah uses both this service and Overdrive. Netlibrary works similarly to Overdrive, but does have a downside if you use an iPod or a Zune- neither of those devices will work due to DRM restrictions.


  • LibriVox "provides free audiobooks from the public domain." This is a great place to get the classics. Files are available in both ogg vorbis and mp3. Another cool thing is this service is completely volunteer based and there are books available in multiple languages.


  • Literal Systems- They have a small selection of audiobooks and short stories.


  • LoudLit.org "is committed to delivering public domain literature paired with high quality audio performances. We pair together great literature and accompanying audio." This website has a few novels, some poetry, short stories, and children's books. Some books have embedded text which is kinda neat too.


  • AudioBooksForFree.com- I wanted to like this site more because it appears to have quite a lot of content. There -are- free audiobooks, but you will pay for them in terms of it being highly inconvinient to download them and the low bitrate (8kbps). For example: You want to listen to Huckleberry Finn by Mark Twain. This isn't a short book by any means, and is divided into 43 files. 43 files that you must download ONE AT A TIME. That paired with the low bitrate makes this probably one of the last sites I'll look at. You can pay to have them zip the file and you can also pay more to have a higher bitrate. I'm not so sure it's worth it with the other options you have available to you.


  • Podiobooks.com has "serialized" audiobooks which are made in podcast format. You can download them via an RSS feed (using podcast software) or by directly downloading episodes from the site.


  • Project Gutenberg has both human read and computer generated audio books from the public domain. This site also has a wide variety of languages.


The last two I am going to mention aren't free, but sometimes have free offers.

  • Simply AudioBooks- A little bit like Netflix but for audiobooks. I used this service in the US for a little while and I actually really enjoyed it. It's about 15$ per month and they mail you the audiobook CDs. Right now they have a free download with no strings attached. I didn't like the book, but someone else might.


  • Audible.com always advertises a free download, but this is usually if you've never been a member before and sign up with them. VERY occasionally they'll offer a free book with no strings attached. You get the most bang for your buck with their subscription service, but you can buy individual titles.

Free always works for me!
Wednesday, August 27, 2008

Big Daddy

As of late, I've taken up the strange hobby of naming my electrical appliances.

  • The stick blender with a chopping attatchment is "Little Choppy"
  • Sewing machine #1 is "Greenie"
  • Sewing machine #2 is "Greenie v2.0"
  • Sewing machine #3 is "Whitie"
  • Overlocker is "Lewie"
  • Martijn's mp3 player is "Little Red Clippy"
As you can see, most of these names are very creative, and as such took quite a lot of consideration and thinking when I came up with them (and by very and quite a lot I really mean "not very" and "not a lot")

So when I acquired this handsome little fellow, I knew I needed to come up with something good!

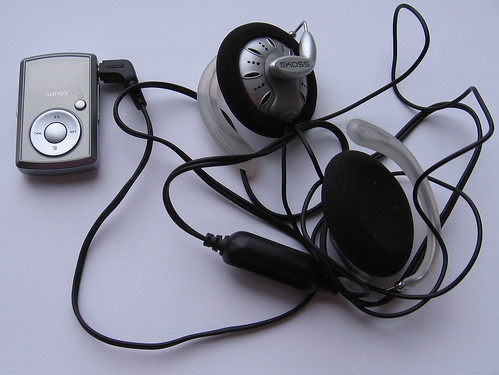
Big Daddy Sansa Clip

It's a Sansa Clip, so I was originally thinking of making a play on the word clip. The problem was that Martijn already -had- Little Red Clippy. I couldn't just rip off that name and call MINE "Little Silver Clippy." And since it was a 4GB instead of a 2GB player, Martijn felt that the size needed to be acknowledged (even though physically, they're identical). After several ideas, many of them inappropriate in more ways than one, BIG DADDY came up. It really is an awful name and I thought "I've got to come up with something better!" But a week has passed, and I have not come up with anything better. So meet Big Daddy, my tiny little mp3 player.

Check out my next post for some good resources for free audiobooks!

Sunday, August 24, 2008

Button Wreath

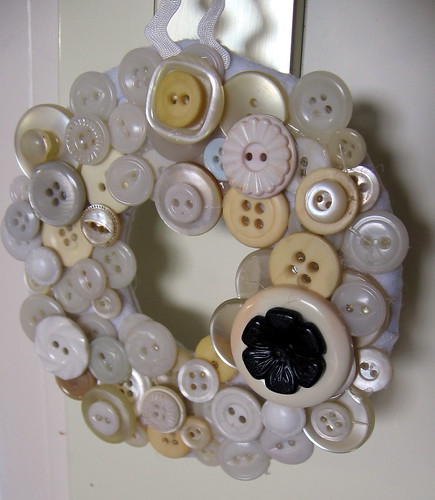
I had a LOT of buttons and a couple of hours to kill today. So I decided I'd make a button wreath and take pictures of how I did it. Here's how it'll look when it's done.

Button Wreath Complete


You will need the following:

A scrap of cardboard big enough to make your wreath on (the size is up to you)
A piece of felt large enough to cover the front and back of your cardboard (either match or contrast with the color of your buttons)
A hefty stack of buttons of all sizes
Hot glue gun (I stole my husband's)
A short piece of rick rack or ribbon for the hanger
A pen and something circular to make your wreath shapes


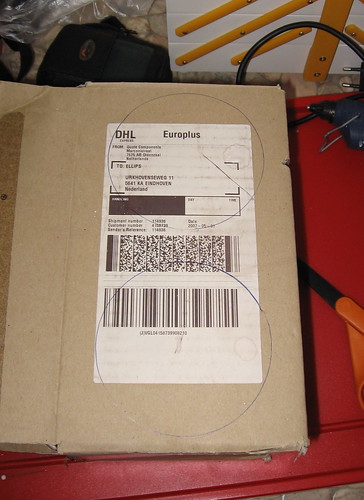
Button Wreath Tut 1
Take your lovely scrap cardboard and trace a circle. The bigger the circle, the bigger your wreath. Cut out your circle with a sharp pair of scissors.


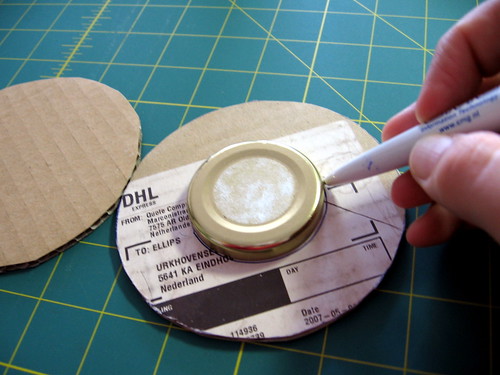
Button Wreath Tut 2
Trace a smaller inside circle. If you make a small inside circle, then the width of your wreath will be thicke. A bigger inside circle will result in a narrower wreath.


Button Wreath Tut 3
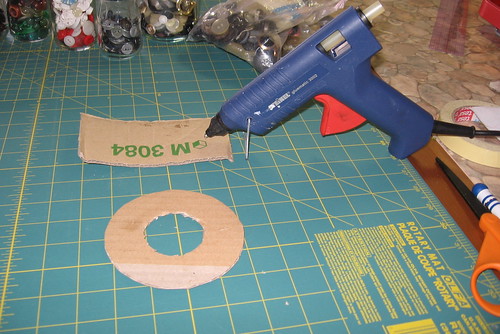
Cut out the inner circles, leaving you with nice a nice cardboard donut. Don't eat it, you will be sad because it doesn't taste nice like a real donut ;)


Button Wreath Tut 4
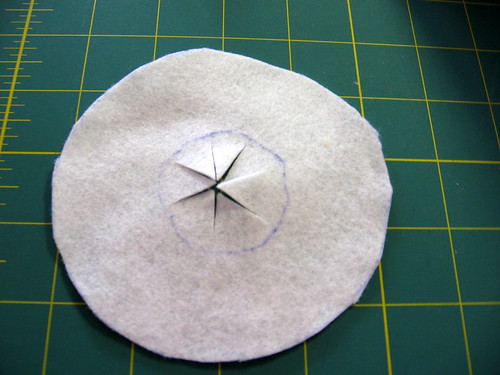
Cut a circle of felt the same size as your cardboard donut. Trace the inner circle and snip the inside like an asterisk up to the edges of the drawn line.


Button Wreath Tut 5
Borrow your husbands hot glue gun and get it nice and toasty.


Button Wreath Tut 6
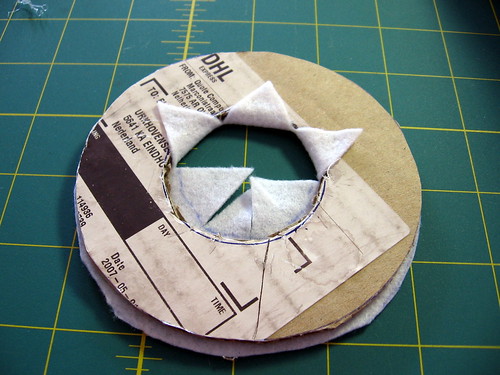
Glue the felt piece to the cardboard, and on the other side fold the cut pieces up and glue them to the back. This will cover the cardboard in the inner hole.


Button Wreath Tut 7
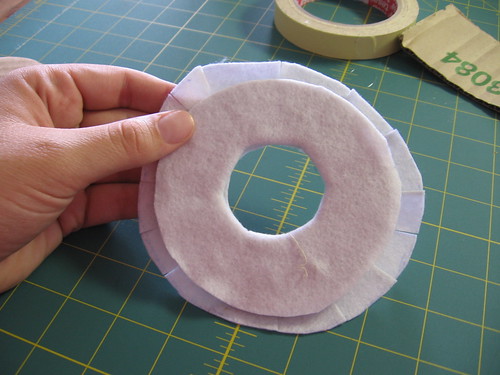
Next, cut another circle of felt, but this time you'll want it bigger than the cardboard donut. Cut out a center hole the same size as the donut hole.


Button Wreath Tut 8
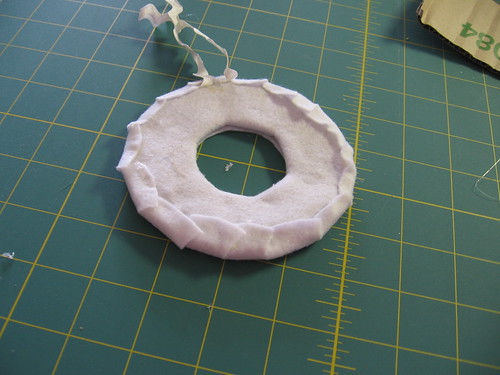
Center the felt over the hole and glue it on the backside. Then clip the felt around the outer edge so you can fold it over.


Button Wreath Tut 9
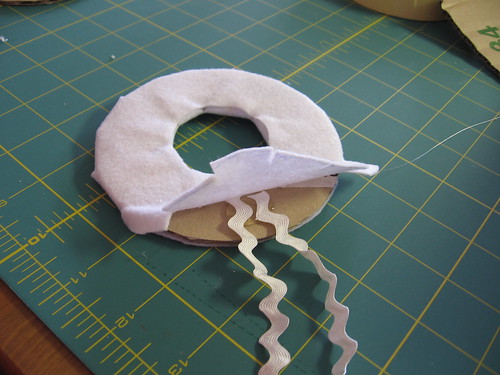
Use a piece of rick rack or ribbon for your hanger and glue it to the back under the felt.


Button Wreath Tut 10
Fold all the snipped bits over and glue them. Your hanger will be in the way a little bit, but you can fold it back up before you glue the buttons on.


Button Wreath Tut 11
Ogle your nice stack of pretty buttons.


Button Wreath Tut 12
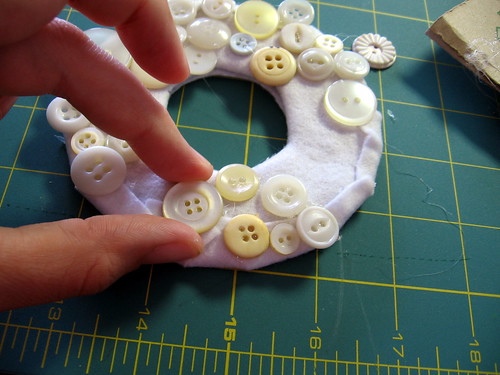
Start gluing on the buttons in a single layer on top of the felt.


Button Wreath Tut 13
Continue gluing the buttons. If you have gaps, that's okay because you can cover them up with the next layer of buttons.


Button Wreath Tut 14
Hide the spaces by layering the buttons. I did it in a rather haphazard manner, but I think it works for projects like these. The bottom layer is the slightly less interesting buttons, and the upper layers are the cuter ones.


Button Wreath Tut 15
Add any last buttons you wish to complete your wreath and clean up the stray hotglue hairs.

Sunday, August 24, 2008

Menu Plan Monday- August 25, 2008

click the banner and "Menu Plan Monday" for more menu planning ideas

CrockPot Tamale Pie- I'm so happy I finally have something that will work as a crockpot! I've made a recipe really similar to this in the skillet, but I'm gonna try it this way and see how it goes.

Tater Tot & Green Bean Casserole- I've been having a crazy craving for this the past few weeks. I tried to resist, but I cannot so I'm going to indulge! This is the closest recipe I can find to how I want it, but I think I'll still make some tweaks.

Chicken Caesar Pasta Salad- I made this a few weeks ago and Martijn really really liked it so he requested it again. I did tweak the recipe quite a bit... made my own dressing, added chopped cherry tomatoes and bell pepper, and made sure everything was cold before I mixed it together.

Black Bean Taco Salad - I need to soak and cook black beans for the tamale pie, so I'll just do extra for this. I need to check my bean supply, the last couple times I went to the Middle-Eastern grocery store they were out of black beans and I think I'm running low.

Zucchini Fritatta- 'tis the season for zucchinis!

Sunday, August 24, 2008

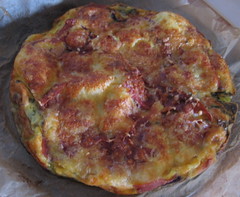
Zucchini Fritatta

You might recognize this, I'm trying to pull over my recipes from my Livejournal and post them here. Sorry for the repeats in the meantime!

Zucchini Fritatta

Zucchini Fritatta
100g salami, thinly sliced and cut into strips
2 red onions*, cut into thin rings
1 zucchini (courgette), cut in thin slices
6 eggs
Herb mix (mixture of basil, oregano, chives, parsley, and thyme- just add how much you think is good)
100g goat cheese**, grated

Preheat the oven to 200° C (400ish F).

Heat a tiny bit of olive oil (just enough to make the salami not stick) in a frying pan, and fry the salami until crisp. Scoop onto a papertowel to pat out the excess grease.

Fry the onion rings and zucchini slices for about 5 minutes, just to soften them up a little bit.

Beat the eggs and spices together in a bowl, along with a little bit of salt, pepper and half of the cheese.

Put the zucchini and onions in the bottom of a large oven dish, and then pour the egg mixture over the top.

Sprinkle the salami and remaining cheese on top and bake for 25-30 minutes or until the top is golden brown.


*The red onions I buy here are -teeny- compared to the ones I got in the US... so if you're reading this thinking "That's a whoooole lotta onion," it's really not. I'd say -maybe- a third of a cup to a half a cup of the red onion.

**I find goat cheese extremely displeasing to my mouth (if you licked a goat, that's exactly what it would taste like, I swear), so I just used mozzarella in the egg mixture, and mozzarella with a tiny bit of shredded gouda for the top.

Thursday, August 21, 2008

Adventures in Cheese Making

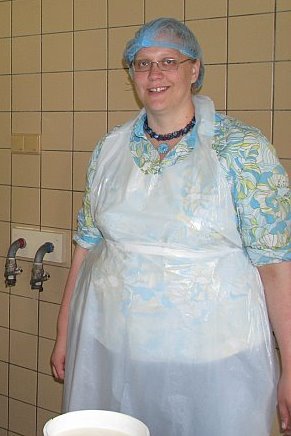
On Tuesday, I went to a little dairy farm in Alkmaar (way way waaaay north) and learned to make cheese!

Cheese making cont1
This is some serious high fashion right here. You can't see them, but I'm wearing little blue plastic booties too.

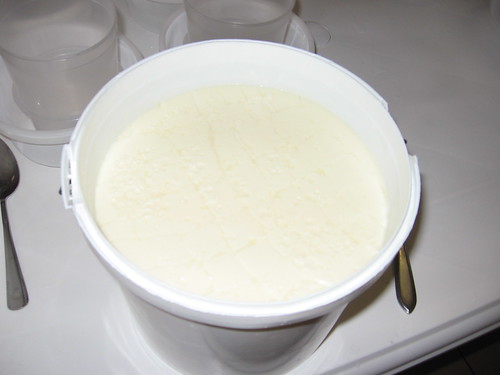
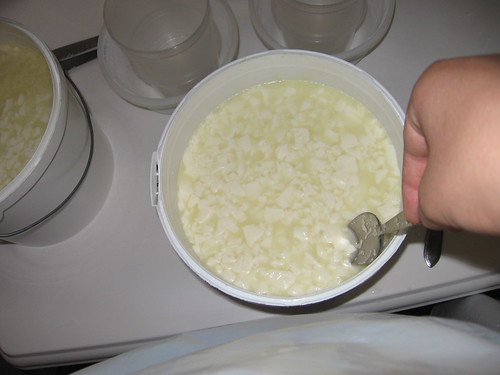
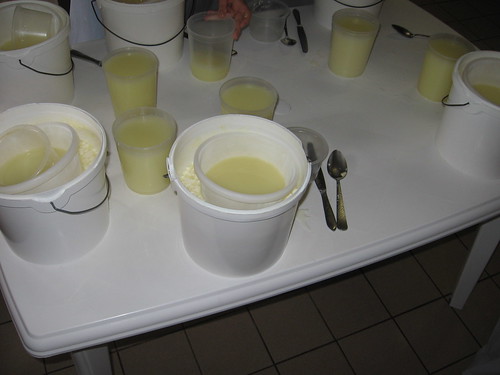
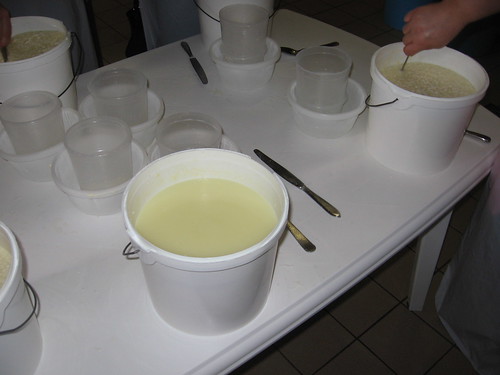
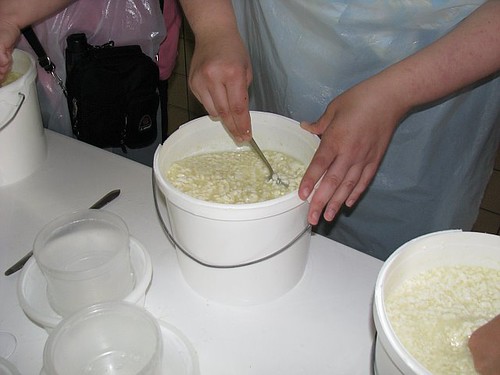
We started out with buckets of firm curd. I wish we'd learned to make the curd, but I suppose for time reasons it's easier if it's pre-started.

First we cut through the curds very slowly with a long knife horizontally, and then vertically.
cheesemaking 0002

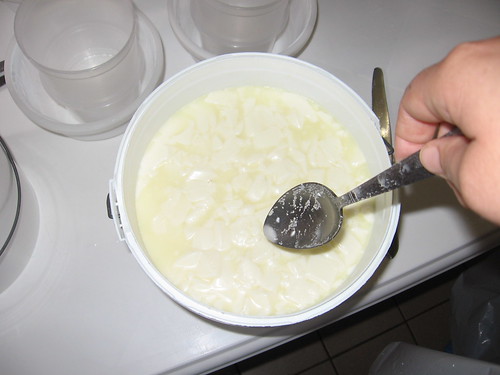
Next, we took a big spoon and gently lifted the strips of curd up and broke them into smaller curds.
cheesemaking 0003

This went on for awhile.
cheesemaking 0005

And a little while longer...
cheesemaking 0006

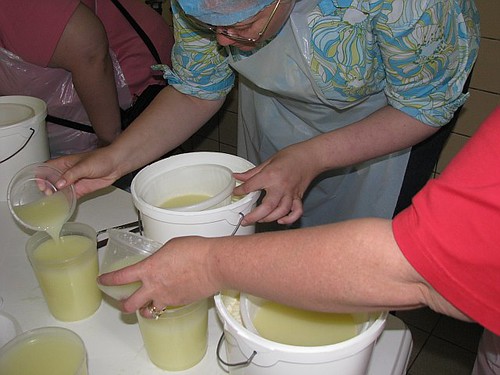
Then we used a strainer to push the curds down and scoop out 1 litre of the whey.
cheesemaking 0007

After you pour out the whey, you replace it with 1 litre of warm water. We did this twice. The aim is to slowly heat the curds up to a temperature of 39 degrees Celcius.
Cheese making cont4

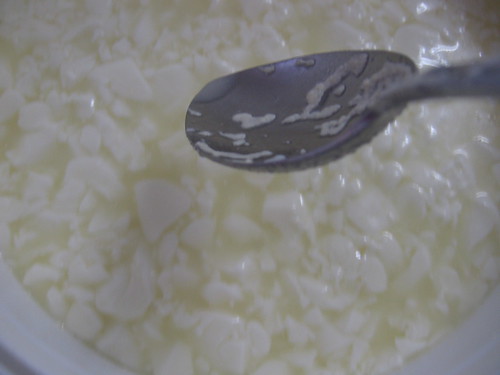
The curds start to sink to the bottom and stick together as you go along.
cheesemaking 0008

Then you stir like mad for some purpose of which I'm not certain... but it was fun. I was a little bit messy though... oops. Actually, I'm pretty sure this is to keep breaking your curds down, I might be wrong though.
Cheese Making cont4

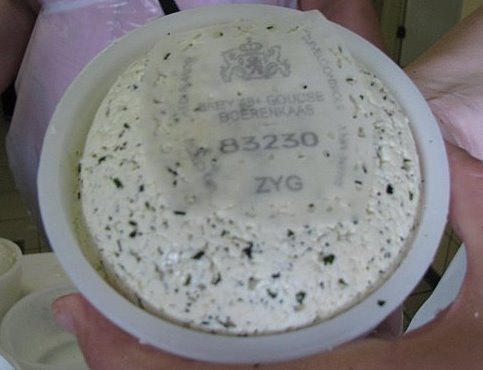
At this point we tested our curds to make sure they squeaked properly and stuck together how they should and drained the whey. If they're the right consistency, you drain the rest of the whey. I added an herb mixture to mine, and then you mix that all together and squish it into the cheese mold. The label says Baby 48+ Goudse Boerenkaas (the 48+ refers to the fat content, and boerenkaas means "farm cheese").
Cheese making cont5

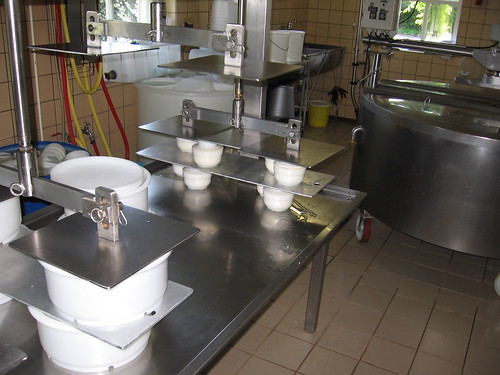
Then into the cheese press!
cheesemaking 0009

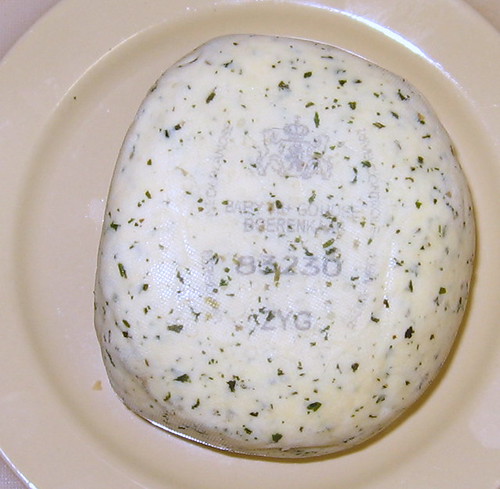
Then I brought it home and put it on a plate where it will sit for the next 2 weeks. Each day it needs to be flipped and on the 1st, 5th, and 10th day, you salt the outside.

Handmade Cheese!

I really really am excited and I hope it turns out and is really tasty! Time will tell.

Monday, August 18, 2008

Menu Plan Monday- August 18, 2008

click the banner for more menu planning ideas


Beef Enchiladas - I'll use this Enchilada Sauce recipe which I've had good success with in the past.

Stuffed Zucchini with Chickpeas - big fat zucchinis are in season! Yay!

Slavinken with new potatoes and green beans.

Baked Whole Cauliflower- I haven't made this before but it actually looks kinda tasty. I'll probably fry up some zucchini and onions to go along with it.

I have an empty day because otherwise I think we'll have TOO MUCH FOOD!

Monday, August 18, 2008

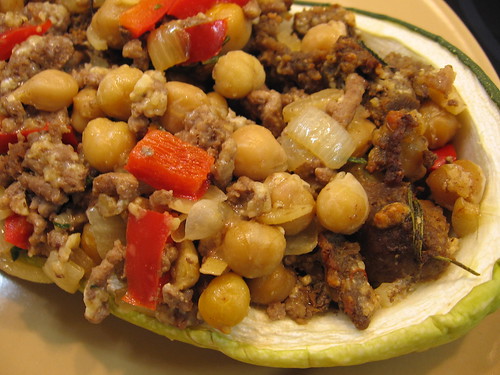
My Version of Stuffed Zucchini

Stuffed Zucchini

This was a bit of an experiment, and boy did it turn out good! I thought about using rice, but had a can of chickpeas in the cupboard and decided to give it a try.


1 big fat zucchini
1 small onion, chopped
1 bell pepper, chopped
1/2 lb ground meat (I used half pork half beef)
2 cloves garlic, minced
1/4 cup broth (I used veggie broth)
1/2 cup Parmesan cheese
1 can chickpeas, drained and rinsed
Fresh rosemary and thyme, chopped (just use how much you think looks good)

Preheat the oven to 375 f (175c in a fan assisted oven).

Wash your zucchini and cut off the stem. Cut the zucchini in half lengthwise and scoop out the seeds and flesh until you have about 1/2" of "meat" left inside. Microwave it on high for about 4 minutes and set aside.

Brown your meat and set aside. Saute the onions and peppers (I used a little bit of the grease from the meat, you don't need much though) until they're soft. Then toss in the fresh herbs and garlic and add the meat and the chickpeas. Cook on medium for a couple minutes just to get everything mixed together well. Add the chicken broth and Parmesan cheese and mix well.

Now it's time to stuff your zucchini! Put half the filling in one side and half in the other. It will be heaping over the top, that's okay. Bake the halves in the oven for about 20-30 minutes. The filling should be slightly browned.

Saturday, August 16, 2008

The moment you all have been waiting for...

Oh ho ho! I thought this project would never be finished! Luckily we've had 3 days of really beautiful weather (hello, where were you last week beautiful weather?) and I was able to fix my um... small problem without too much drama.

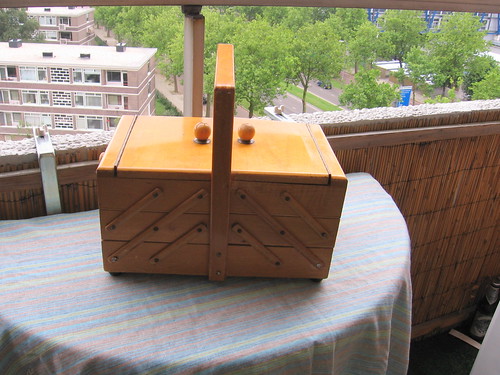
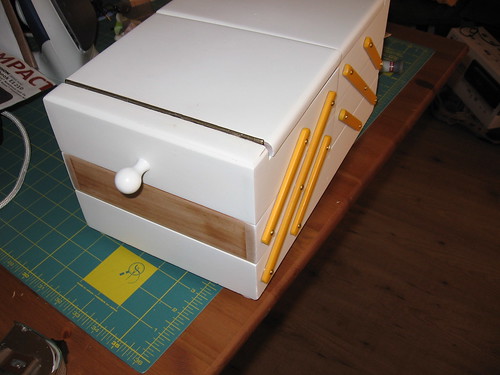
Here's what it looked like before. I should've taken a better shot of how absolutely battered this thing was. You also can't tell, but one of the lids is warped (which I can't fix).
sewingboxbefore

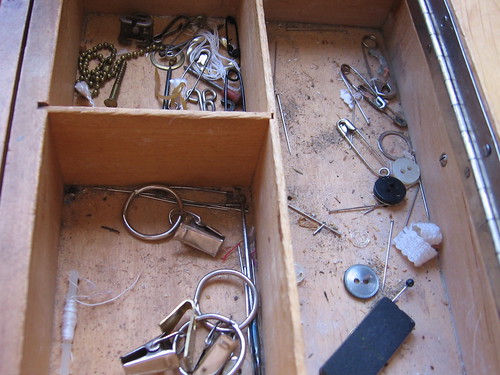
In the process of cleaning this thing out, I found enough dirt to plant vegetables! Ew.
sewingboxreallydirtyinside

Took it all apart and sanded it down good to get all the gross stuff off.
sewingboxdisassembled

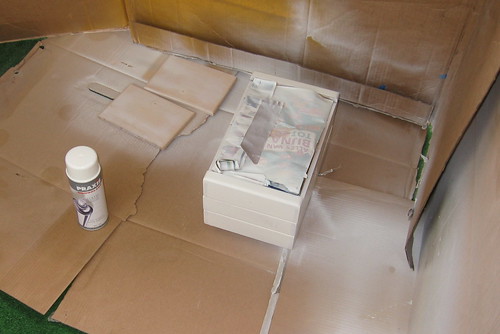
We won't talk about how many cans of spraypaint I actually used in the process of this project. Here you see can #2 of the white.
sewingboxprogress1

And the yellow paint... this was with the lousy non-covering paint. The second can was much better paint.
sewingboxprogress2

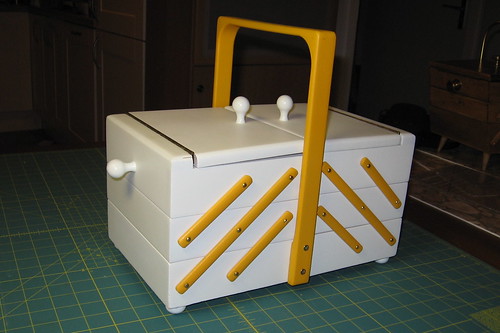
Oh lookie! All done =D The problem from before has been taken care of with spray can #3 of the white... which I wouldn't have needed if I had done it right in the first place!
sewingboxdone

Here it is folded out. I lined the inside with squares of felt. Maybe I should've painted the inside too, but it's done and I'm not taking it apart to paint it again... ever.
sewingboxdonefoldedout

Friday, August 15, 2008

Ik heb een kleine fout gemaakt

(Translation: I have made a small mistake)

Uh, so... the weather was really nice yesterday and I very excitedly sprayed on a final clear coat and left it to dry for a few hours. Then, I was putting it together and the old screw holes weren't lining up! Then Martijn said "flip it around" and I came to the sad sad sad realization that I painted the wrong end of this one piece.

Sewing Box Mishap

I moped around for awhile, and then took it outside to spray the CORRECT end... and... the paint can was completely empty. Not even a tiny little squirt left.

I still think maybe it'll look nice if I ever finish it!

Wednesday, August 13, 2008

The Weather is Thwarting My Plans

By today I had hoped I would be posting wonderful pictures of a new sewing box I bought at a flea market in Germany a couple of weeks ago. It was in tough shape so I thought sanding it and painting it to make it look nice would be a quick project. Except I have been faced with days and days of weather that looks like this:

Picture 1159

See that little piece of blue sky poking through? It shows up every couple of hours for about 15 minutes. Which is exactly enough time to set everything up only to have to run it back inside because it's started raining again. This wouldn't be such a problem if I could import Grandpa M's shop over here. Then I'd have room to paint and it wouldn't matter how crummy the weather was!

Maybe I'll have it done by next week. Maybe.

Thursday, August 07, 2008

First Post

Well, I suspect the title says it all really.  This is the first post in my new blog!  I have been using LiveJournal for many years, but I find it lacking in a couple of departments so I've decided to give Blogger a go.  A couple of very wise family members turned BLOG into an acronym.  I think it basically says it all!

Brag Loud & Often but Graciously

Livejournal seems like more of... well, a journal.  With this blog I plan on bragging myself up so the rest of the world knows how truly awesome I really am (uh, maybe the graciously part will go out of the window with this).

So now, a little info for those of you who don't already know me!  I'm a 26 year old girl from Utah who fell for a Dutchman, got married, and moved across the sea.  Right now I'm trying to learn Dutch and do my integration exams.  After being here for 3 years and finishing my integration exams, I will qualify for Dutch citizenship, which I plan on getting so that I can VOTE.  Since I'm married to a Dutchie, I won't have to surrender my American passport. 
I really like to make stuff.  People ask me what I like to make and my answer usually is... well, a little bit of everything.  This doesn't mean I'm actually -good- at everything but I certainly would LIKE to be eventually.  My mom tells me I'll be as good of a seamstress as her after I've had as much practice.  I don't want to wait that long, but I suspect she's right.  Because I'm evil, when she complains about not being able to type very fast or do things with the computer I will respond with "When you've been doing it as long as I have..." 

Since I'm a stay at home and make messes wife, I've had time to experiment with cooking which I'm actually starting to enjoy a little more.  This doesn't mean that I have given up on frozen pizzas though!  I participate in a menu planning meme that I plan on posting here too.

I suspect that this is getting a little wordy and about 93% of my readers have fallen asleep by the 2nd paragraph, so I'll wrap it up.  I love getting comments and hope to meet some new people in this endeavour.  Cheers! 
Related Posts with Thumbnails