Showing posts with label projects. Show all posts

Wednesday, November 11, 2009

Diaper Cakes

It seems as if everyone and their cat is having a baby in the next few months or has just had a baby, so I thought I'd share some photos of diaper cakes I've made in the past. Maybe it will inspire you (well you can pretend for my sake, okay?) to make something fabulous of your own! You don't need to spend a lot of money to make these wonderful. Use what you have and scout the discount stores to find little goodies to put on them.

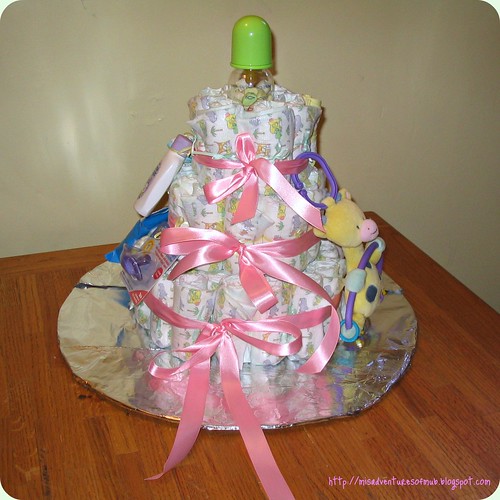
We'll start off with the first one I ever made. As you can see, my very expensive looking cardboard tray covered with aluminum foil makes a great platter! I tended towards the pastels on this one and used "after dinner" mints in the bottle as a treat.

diaper cake 002

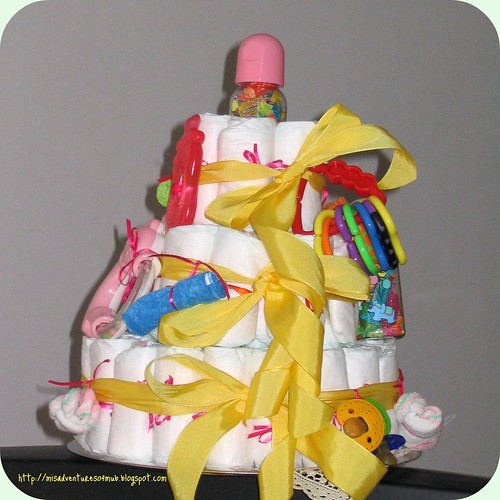
For this one, the platter is slightly more sophisticated: an old deli tray from Sam's Club that we scrubbed off. I stole this yellow ribbon from my mom's stash. If you looked hard enough you could probably find a picture of me as a kid wearing a hairbow made of the same exact stuff.

diapercake-3

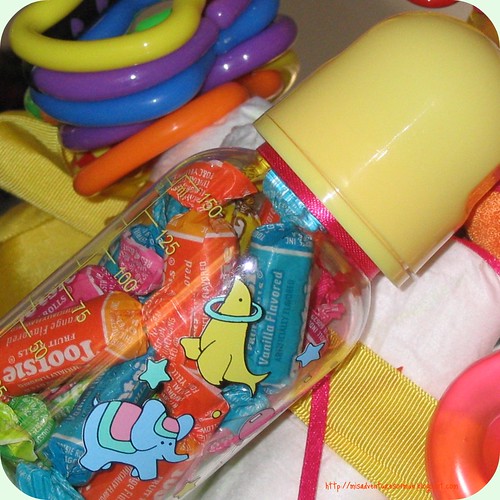
Since I was leaning towards a slightly brighter color scheme, I put flavored Tootsie Rolls in the bottle to give it a little extra pizazz.

diapercake-5

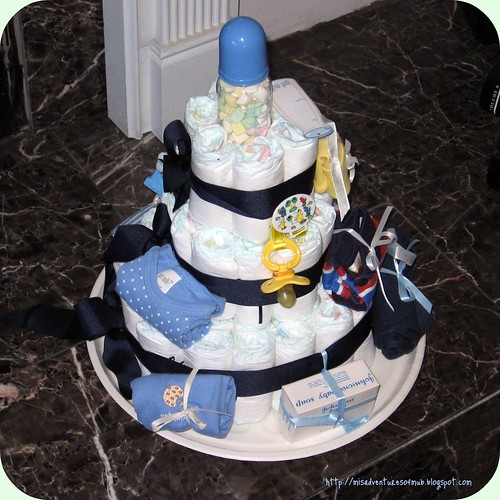
Did you know that Papa Murphy's will give you an extra pizza tray if you ask? Proof is right here! I found this cute little "Got Milk?" baby set at Big Lots! for not a lot of money and used it as my color inspiration and theme. There are probably pictures of me with a navy blue hairbow too.

Picture 016

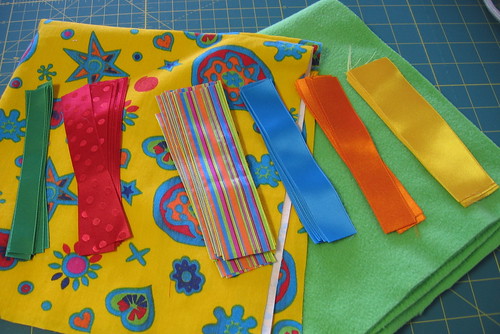
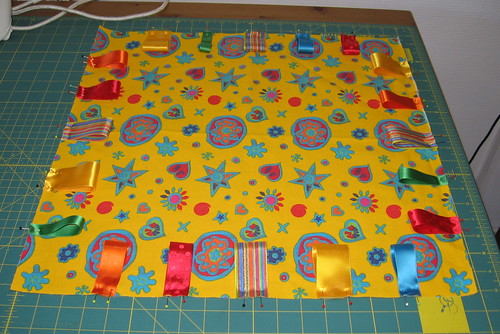
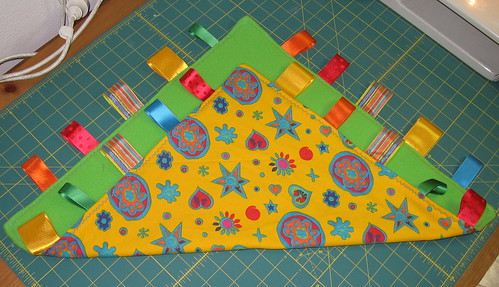
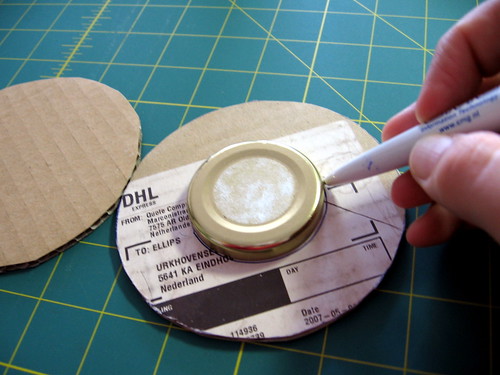
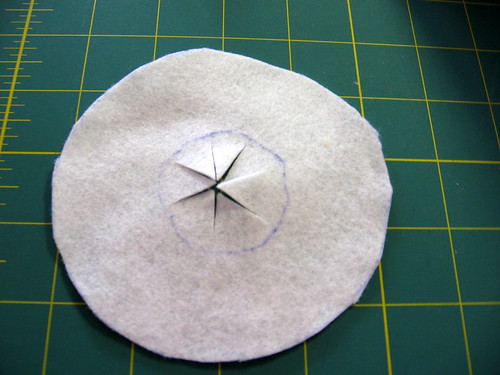
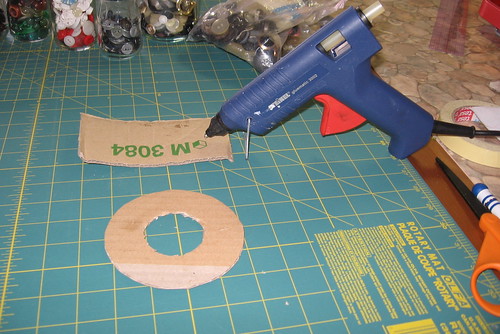
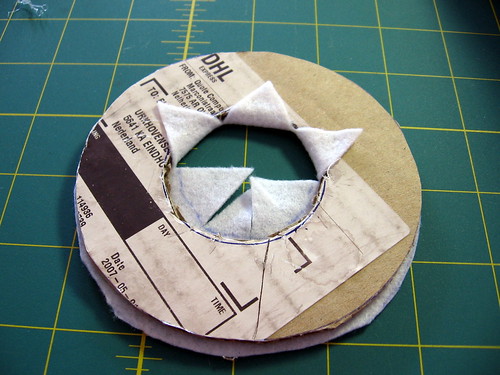
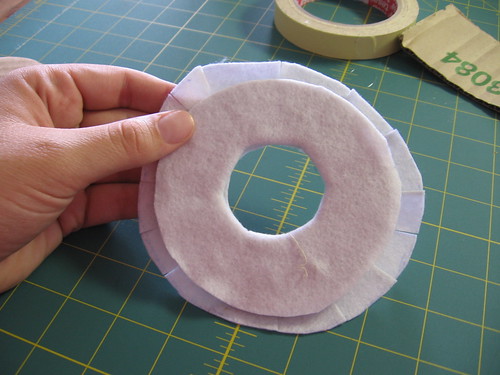
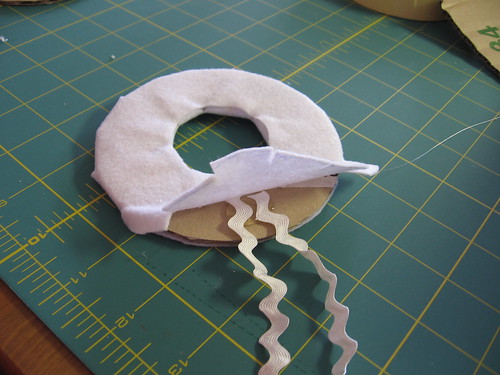
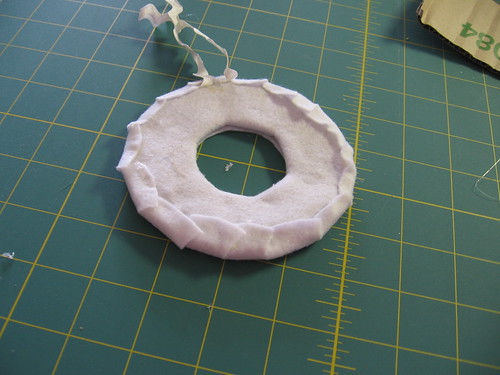
Lastly we have my most recent creation. This one was a little harder since I made it here in The Netherlands and didn't have access to the store of Mom and everything is just so expensive here. I found little metal tray 2 euros which I then covered up with this little ribbon blankie. The friend I made this for didn't want any bottles since she was planning on getting some special ones, so I found this cute little frog that was folded out of towels. I need to learn how to make these for myself cause I thought he was mighty cute!

Picture 2949

What do you like to do for baby gifts?

Monday, June 22, 2009

Jummy Prototype

Sometime last week Mr Jummy walked in sniffling (strangely, his sniffling sounds a lot like Martijn's sniffling). He said he was lonely. So, what's a person to do?

Mr Jummy needs a wife
The Future Mrs Yummy

I think maybe it would've been useful to get some sort of structural engineering degree in order to construct this thing, but there has been some progress made. I'm pretty happy with the arms and legs at this point and the head is midway there. I think I need to do some final tweaks on it to make it the right shape. Then the body and actually putting the thing together. Meanwhile, it looks like something very very violent occurred here.

Carnage and mayhem!
Carnage and Mayhem!

Once we get the prototype done, then we can work on a Mrs Yummy (she's going to be an American, hence the Y instead of J)!

Saturday, March 28, 2009

Sneak Preview

Here's a little peek at my current project.

Picture

I'm not quite finished yet, so you'll just all have to wait in suspense one or two more days! If I have some matching ribbon in my stash then you can see it tomorrow, if not you'll have to wait until Monday.

Wednesday, March 11, 2009

Felty Goodness

Felty Goodness
This is my nice stack of felt. I'm hoarding it because it's so horribly horribly expensive here, but last night I pulled it out to work on something. Would you like to know what I'm working on?

Too bad, I'm keeping it a secret until I'm finished. What would -you- do with a giant stack of felt?

Thursday, November 20, 2008

Kitty Wallhanging- in progress

catwallhanging


In my horrifying stack of unfinished projects I have this little wall hanging. Which has really been in the unfinished projects far longer than I care to admit to. I put it on my 26 before 27 list so that I'd have some sort of goal. I got quite far with it initially and then got hung up on how I wanted to do the appliqué stitches. It's felt, so technically it would probably even be okay if I just let it be, but it didn't really look -finished- that way.

catwallhangingappcloseup


I decided to do a blanket stitch around the kitties. I've done quite a bit more stitching on it since I took these pictures, but I think I'm going to pull out the black and do it with one strand of floss instead of two. I did the maroon parts on the grey cat with a single strand of sewing thread and it's a lot less obtrusive. I want it to be visible but I feel like right now it's a little thicker than I want it.

Now since I posted about it, I'm hoping my dear faithful readers will occasionally say "Hey, how's that little kitty wall hanging of yours coming along?" Because then I -have- to finish it. I can't let you people down!

Wednesday, November 12, 2008

Ribbon Blankie

I was invited to a baby shower in a couple of weeks and started having this panicked feeling about what I was going to do for a gift. For many of the recent (uh, recent being before I moved) showers I've attended, I'd put together diaper cakes. I had it down to a science and I knew where to buy the most economical supplies for said diaper cakes. Here I struggle to find GROCERIES sometimes, so I decided that probably wasn't an option for this one. I was kicking around the idea of making a teddy bear, but quite frankly my teddy bear skills are still in their infancy and I didn't want to give a bear to a child who would be merrily playing with it only to have it's head fall off or one of the limbs detach. Talk about trauma!

So I was at the thrift store browsing through the fabric that they sometimes have and I spotted a very bright funky piece of fabric. I asked Martijn if he thought it was unisex-ish enough for a boy gift and he said yes. Now I just needed to figure out what to do with it! I did a little brainstorming and decided it would be perfect for one of those little ribbon tag blankets. I went to my favorite store on the planet, the Smitje (a shop with every kind of crazy little sewing notion you can think of) to get some ribbon, and to the market to get a piece of fleece for the backing.

Since it was probably going to be barfed on at some point in it's life, I prewashed all the fabric and ribbons and dried them in the dryer to make sure there wouldn't be future shrinkage. I cut a 20 inch square from both the cotton and the fleece, and then cut all the ribbons I'd found into 5 inch pieces.

Picture 1663

Then I folded the ribbons in half and pinned them to the right side of the cotton fabric. To make the sides somewhat even, I found the center of each edge and placed the striped ribbon exactly in the middle. I then measured two inches from either side to place the next two ribbons, and then two inches out again from there. That seemed to work pretty well, but if all of my ribbons had been as wide as the yellow one or the striped one, I might've used less ribbons per side.

Picture 1664

Next, just lay the fleece right side down onto your square and pin it. Stitch around the outside edges using about a 3/8" seam allowance. For extra security you can reverse over the ribbons, but I found it faster to just go around the whole thing twice. Make sure to leave an open edge for turning it right side out! Turn it right side out and poke the corners out so that they lay nice. With the bulkiness of the fleece, mine had a slightly rounded edge. Whip stitch up the hole you left to turn it right side out. Then top stitch around the outer edge. I used a decorative stitch because I could, but it's certainly not necessary.

Ribbon blankie

Saturday, October 04, 2008

DS Lite Restoration Project 2008

Did you ever wonder what the inside of a Nintendo DS looks like?

If you said no, then I'm sorry. If you said yes, then HERE YOU GO!

DS Restoration Project

A few weeks ago, we were laying in bed and Martijn let out a mournful groan. DISASTER HAD STRUCK! His DS hinge had given up the ghost.

DS Restoration Project
Apparently, this is a known weak spot on the DS and if you Google "cracked hinge" all of the search results on the first page (minus one) are about the hinge problem!

Martijn bought his DS lite right when they came out in 2006, so it was very very much out of warranty. Sending it to Nintendo for a hefty (almost 90€) fee was really not looking like a nice plan, and getting a new one for €149 was sortof out of the question and silly, since otherwise the device was still in good shape. We hemmed and hawed about it and decided the most economical solution was going to be to replace the housing.

Now the tricky part was deciding what color he wanted his new DS to be. You can get new housings in a bunch of different (and non-factory) colors. After much deliberation I ordered the blue and black "full replacement housing" from dealextreme.com for him. Since it was a shiny metallic paint and we were worried about scratches, we also ordered a clear snap on case to go over it (more on that later). A set of new button pads and a triwing screwdriver so we could get into the thing finished out our order.

When I've ordered from dealextreme.com in the past, I usually have forgotten what was in my order by the time it gets to me because the shipping from China is SO SLOW. Since we were worried about the opposite hinge on his DS, I loaned him MY snap-on clear case. Luckily, the order only took a week and a half, which is really breakneck speed compared to how slow some of my previous orders were.

Now some words of wisdom:
  • This is a very fiddly project.
  • There will likely be swearing involved.
  • If you do this you will probably want to know how to use a soldering iron in case you break one of your shoulder buttons off.
  • If you forget to install the power and volume buttons, you will have to take things completely apart again to put them back in.
  • Same with if you forget to take the little metal nut that the battery cover screws into out of your old housing.
  • The awesome transparent case you bought to snap on your DS so it won't get scratched might not actually fit an aftermarket housing.
  • The replacement buttons that come with many of the replacement housings aren't as good as the originals so you might just decide to reuse the old ones.
  • And the old screen covers.
  • I really recommend reading the reviews of the housings (or replacement shells) at gbatemp.net. Here's a link.


DS Restoration ProjectDS Restoration Project

Martijn said (very diplomatically I might add) "It was a lengthy, and at times, stressful project. In the end I'm glad to say the result was more than satisfactory."

To see more of the carnage process, you can check out the flickr set here.

Sunday, August 24, 2008

Button Wreath

I had a LOT of buttons and a couple of hours to kill today. So I decided I'd make a button wreath and take pictures of how I did it. Here's how it'll look when it's done.

Button Wreath Complete


You will need the following:

A scrap of cardboard big enough to make your wreath on (the size is up to you)
A piece of felt large enough to cover the front and back of your cardboard (either match or contrast with the color of your buttons)
A hefty stack of buttons of all sizes
Hot glue gun (I stole my husband's)
A short piece of rick rack or ribbon for the hanger
A pen and something circular to make your wreath shapes


Button Wreath Tut 1
Take your lovely scrap cardboard and trace a circle. The bigger the circle, the bigger your wreath. Cut out your circle with a sharp pair of scissors.


Button Wreath Tut 2
Trace a smaller inside circle. If you make a small inside circle, then the width of your wreath will be thicke. A bigger inside circle will result in a narrower wreath.


Button Wreath Tut 3
Cut out the inner circles, leaving you with nice a nice cardboard donut. Don't eat it, you will be sad because it doesn't taste nice like a real donut ;)


Button Wreath Tut 4
Cut a circle of felt the same size as your cardboard donut. Trace the inner circle and snip the inside like an asterisk up to the edges of the drawn line.


Button Wreath Tut 5
Borrow your husbands hot glue gun and get it nice and toasty.


Button Wreath Tut 6
Glue the felt piece to the cardboard, and on the other side fold the cut pieces up and glue them to the back. This will cover the cardboard in the inner hole.


Button Wreath Tut 7
Next, cut another circle of felt, but this time you'll want it bigger than the cardboard donut. Cut out a center hole the same size as the donut hole.


Button Wreath Tut 8
Center the felt over the hole and glue it on the backside. Then clip the felt around the outer edge so you can fold it over.


Button Wreath Tut 9
Use a piece of rick rack or ribbon for your hanger and glue it to the back under the felt.


Button Wreath Tut 10
Fold all the snipped bits over and glue them. Your hanger will be in the way a little bit, but you can fold it back up before you glue the buttons on.


Button Wreath Tut 11
Ogle your nice stack of pretty buttons.


Button Wreath Tut 12
Start gluing on the buttons in a single layer on top of the felt.


Button Wreath Tut 13
Continue gluing the buttons. If you have gaps, that's okay because you can cover them up with the next layer of buttons.


Button Wreath Tut 14
Hide the spaces by layering the buttons. I did it in a rather haphazard manner, but I think it works for projects like these. The bottom layer is the slightly less interesting buttons, and the upper layers are the cuter ones.


Button Wreath Tut 15
Add any last buttons you wish to complete your wreath and clean up the stray hotglue hairs.

Saturday, August 16, 2008

The moment you all have been waiting for...

Oh ho ho! I thought this project would never be finished! Luckily we've had 3 days of really beautiful weather (hello, where were you last week beautiful weather?) and I was able to fix my um... small problem without too much drama.

Here's what it looked like before. I should've taken a better shot of how absolutely battered this thing was. You also can't tell, but one of the lids is warped (which I can't fix).
sewingboxbefore

In the process of cleaning this thing out, I found enough dirt to plant vegetables! Ew.
sewingboxreallydirtyinside

Took it all apart and sanded it down good to get all the gross stuff off.
sewingboxdisassembled

We won't talk about how many cans of spraypaint I actually used in the process of this project. Here you see can #2 of the white.
sewingboxprogress1

And the yellow paint... this was with the lousy non-covering paint. The second can was much better paint.
sewingboxprogress2

Oh lookie! All done =D The problem from before has been taken care of with spray can #3 of the white... which I wouldn't have needed if I had done it right in the first place!
sewingboxdone

Here it is folded out. I lined the inside with squares of felt. Maybe I should've painted the inside too, but it's done and I'm not taking it apart to paint it again... ever.
sewingboxdonefoldedout

Friday, August 15, 2008

Ik heb een kleine fout gemaakt

(Translation: I have made a small mistake)

Uh, so... the weather was really nice yesterday and I very excitedly sprayed on a final clear coat and left it to dry for a few hours. Then, I was putting it together and the old screw holes weren't lining up! Then Martijn said "flip it around" and I came to the sad sad sad realization that I painted the wrong end of this one piece.

Sewing Box Mishap

I moped around for awhile, and then took it outside to spray the CORRECT end... and... the paint can was completely empty. Not even a tiny little squirt left.

I still think maybe it'll look nice if I ever finish it!
Related Posts with Thumbnails