I sorta went off on my own this week in regards to the Food Network Chefs Cooking Challenge. I took the Tuna Everything Bagel recipe from Tyler Florence and made it my own! Sorta... well, not really but I did change a few things.
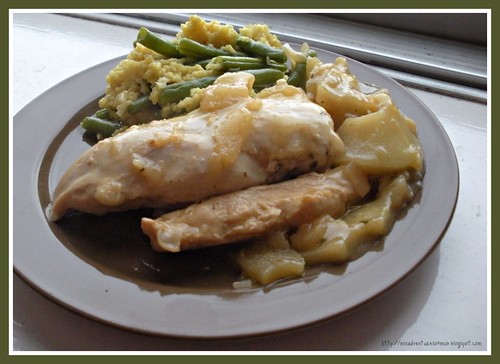
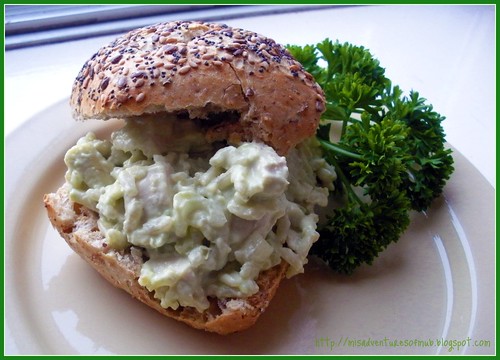
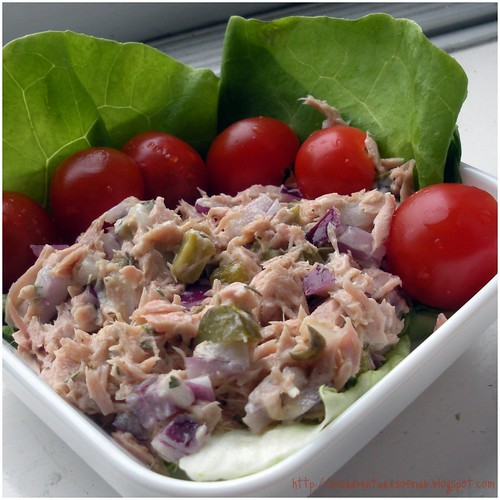
First, you might notice that the bagel is missing. Actually you might be noticing the whole "sandwich" aspect of the thing is missing. I wish I had a cool story about ninjas stealing my camera so I couldn't photograph the actual sandwich, but we were hungry and ate them before I even thought of taking a picture! The lovely tomato guarded tuna salad photo above is from my dinner night when Martijn was out with friends. It's the same salad, minus the sandwich part. Anyhow, I've seen bagels here before but not been compelled to buy them. I used these whole wheat "bake at home" breads that I like for sandwiches like this. Secondly, I did not artfully sling red onion rings over the top of my tuna salad tower like the photo on the Food Network site shows. I hacked them up into little bits and added them into the salad. For the sandwiches I didn't bother with the tomato and cucumber and we had a side salad instead. Lastly, I used dried herbs since I had everything I needed and didn't have to buy anything this way.
Onward to the recipe!
Tuna Everything Bagel
Courtesy Tyler Florence
Ingredients
Tuna Salad:
3 cups good quality canned tuna (packed in water), drained (This seemed like a lot. I used two of the normal sized tuna cans and I don't think it was anywhere near 3 cups)
1/4 cup mayonnaise
4 cornichons, chopped (These are just little pickles. Don't be fooled by the fancy French word!)
2 tablespoons chopped fresh dill (2 tsp dried)
1 tablespoon chopped fresh tarragon leaves (1 tsp dried)
2 tablespoons freshly chopped parsley leaves (2 tsp dried)
2 tablespoons capers, drained (I chopped these up too since the flavor is okay but the texture freaks me out if I bite into a whole one)
1 lemon, juiced
Kosher salt and freshly ground black pepper
1/4 to 1/2 cup extra-virgin olive oil, or to taste
2 everything bagels, sliced and toasted
1/4 cup cream cheese
1/2 red onion, thinly sliced crescents (chopped small enough to add to the salad)
1 vine-ripened tomato, sliced (skipped on the sandwiches)
1 seedless cucumber, sliced (skipped on the sandwiches)
4 Bibb lettuce leaves
Directions
Begin with the tuna salad. Combine ingredients in a large mixing bowl and stir to combine. I recommend mixing everything EXCEPT the olive oil and then add it last so you can get the right amount of moisture from it. It's hard to tell if you need more or less if you add it before things are mixed up. Taste and adjust seasoning with salt and pepper.
Take cut bagels (or whatever) and toast under a hot broiler until golden brown. While still hot smear the bottom with the cream cheese immediately. Top with a scoop of the tuna salad and then layer with red onion, tomato, cucumber and lettuce. Or, if you're me, scoop on a glob of salad and leave the snooty artful onion slinging for the experts. Add the top half of the bagel and serve.
The Verdict: This was good! In fact, I've already made it twice this week. I like that it has a little less mayo and the cream cheese between the bread and the salad is genius!
Showing posts with label Food Network Chefs Cooking Challenge. Show all posts
Wednesday, May 12, 2010
Wednesday, May 05, 2010
Apple Cider Chicken
Sunny Anderson seems to have a LOT of good looking uncomplicated recipes that normal humans would eat! Sometimes of the recipes I've found for other chefs had me wondering who their target audience actually was, but I think Sunny's target audience is ME! I made Apple Cider Chicken
Apple Cider Chicken
Courtesy Sunny Anderson
Ingredients
2 tablespoons olive oil
2 tablespoons butter (skipped this since I didn't think it needed both oil and butter)
4 boneless, skinless chicken breasts (about 2 pounds) (I made two breasts but didn't halve the sauce ingredients)
Salt and freshly ground black pepper
1/2 Vidalia onion, chopped (for the Netherlandians- Albert Heijn has zoete uien or you can find them at most markets)
1 Granny Smith apple, cored and sliced into 1/4-inch wedges (peeled mine and added an extra apple)
3 cloves garlic, minced
2 teaspoons dried thyme
2 bay leaves
2 tablespoons all-purpose flour
1 1/2 cups apple cider (I used some unfiltered apple juice since I think it's basically the same thing... can anyone confirm or deny this? "Cider" here is alcoholic).
Directions
Heat oil and 1 tablespoon butter in a skillet over medium-high heat. Season the chicken breasts with salt and pepper, add to pan and sear until golden, about 4 minutes each side. Remove chicken from pan, and set aside. Add remaining butter and onion, apple, garlic, thyme and bay leaves. Saute until apple begins to get color and onions soften, about 6 minutes. Add flour and stir 2 to 3 minutes. Nestle chicken back into pan, add cider, bring to a boil, reduce to a simmer and cover. Cook until chicken is cooked through, about 12 minutes.
The Verdict: YUM! I'm not always in the mood for fruity sweet with my meat, but this really hit the spot. I think it would be a wonderful sauce to put on pork chops too!
Wednesday, April 28, 2010
Chicken Teriyaki with Ginger Rice
I had a bit of a tricky time choosing a Sandra Lee for this weeks Food Network Chefs Cooking Challenge recipe because she uses so many pre-made ingredients. I have nothing against using pre-made stuff but it can be hard to track down here! I had some drumsticks in the freezer so I decided to make the Chicken Teriyaki with Ginger Rice.
Chicken Teriyaki with Ginger Rice
Courtesy Sandra Lee
Ingredients
In a large plastic resealable bag, add the soy sauce, brown sugar, garlic, and grated ginger and mix until the sugar is dissolved. Put the chicken thighs into the bag with the marinade. Seal and refrigerate at least 2 hours or as long as overnight.
Preheat a grill or grill pan over medium heat. (I cooked these in the Turbo but followed the grilling instructions)
Remove the chicken from the marinade and set aside. Put the marinade in a pot over medium heat and reduce by half. Oil the grill grates with canola oil, arrange the chicken on the grill, skin-side down and cook for 8 minutes per side. Brush the chicken liberally with the reduced marinade before turning.
In a medium pot combine the rice, sliced ginger, salt and 3 1/2 cups of water. Bring to a boil over medium heat, then reduce the heat to low and cover. Let cook until the rice has absorbed all the water and is fluffy, about 15 to 20 minutes.
While the chicken is cooking, put the scallions on the grill. Cook until wilted, about 2 minutes per side. I forgot to do this, oops!
Transfer the rice to a serving platter, discarding the sliced ginger. Top with the cooked chicken, garnish with grilled scallions and serve.
The Verdict: The chicken was good. I think that I still prefer my other chicken recipes over this one, but it did have less ingredients and went together pretty fast. The rice was just boring so I won't keep that recipe around.
Chicken Teriyaki with Ginger Rice
Courtesy Sandra Lee
Ingredients
- 1/2 cup reduced sodium soy sauce
- 1/4 cup brown sugar (2 tbsp brown sugar Splenda)
- 1 tablespoon chopped garlic
- 1 (1-inch) piece peeled, fresh ginger, divided use, 1/2 grated the other half thinly sliced
- 2 pounds skin-on boneless chicken thighs (I did drumsticks)
- 1 tablespoon canola oil (skipped this)
- 2 cups conventional white rice (I don't eat much white rice so we did brown instead)
- 1 teaspoon salt
- 3 1/2 cups water
- 1 bunch scallions, ends removed
In a large plastic resealable bag, add the soy sauce, brown sugar, garlic, and grated ginger and mix until the sugar is dissolved. Put the chicken thighs into the bag with the marinade. Seal and refrigerate at least 2 hours or as long as overnight.
Preheat a grill or grill pan over medium heat. (I cooked these in the Turbo but followed the grilling instructions)
Remove the chicken from the marinade and set aside. Put the marinade in a pot over medium heat and reduce by half. Oil the grill grates with canola oil, arrange the chicken on the grill, skin-side down and cook for 8 minutes per side. Brush the chicken liberally with the reduced marinade before turning.
In a medium pot combine the rice, sliced ginger, salt and 3 1/2 cups of water. Bring to a boil over medium heat, then reduce the heat to low and cover. Let cook until the rice has absorbed all the water and is fluffy, about 15 to 20 minutes.
While the chicken is cooking, put the scallions on the grill. Cook until wilted, about 2 minutes per side. I forgot to do this, oops!
Transfer the rice to a serving platter, discarding the sliced ginger. Top with the cooked chicken, garnish with grilled scallions and serve.
The Verdict: The chicken was good. I think that I still prefer my other chicken recipes over this one, but it did have less ingredients and went together pretty fast. The rice was just boring so I won't keep that recipe around.
Wednesday, April 21, 2010
Chicken & Chorizo Sandwiches with Fried Peppers
This week will be my thirty-first Food Network Chefs Cooking Challenge post! I had no idea we'd been doing this quite so long already. I've managed to make & post something from every single chef so far (minus one... I made the recipe and didn't post it, oops!). This week brings us to Robin Miller. She has a lot of great looking recipes and I love that they're so fast to make!! Lately I haven't been feeling like spending quite so much time cooking so these quick recipes I'm finding just make me feel HAPPY! I made Chicken and Sausage Sandwiches with Fried Bell Peppers (uh, longest recipe title ever?).
Chicken and Sausage Sandwiches with Fried Bell Peppers
Courtesy Robin Miller
Ingredients
2 tablespoons olive oil, divided (skipped this and used the grease from frying the chorizo instead)
2 medium red bell peppers, seeded and sliced into thin strips
1 cup onion sliced into half-moons
Salt and freshly ground black pepper to taste
1 pound cooked shredded chicken
1 cup diced chorizo, andouille, or other cooked spicy sausage (I used chorizo)
2 tablespoons balsamic vinegar
4 long rolls (submarine or hoagie rolls)
Directions
I fried the chorizo first and then set it aside until it's added later
Heat 1 tablespoon of the oil in a large skillet over medium-high heat (again, just used the grease from the chorizo). Add the bell peppers and onion and cook, stirring, until softened, about 5 minutes. Season with salt and pepper. Remove the vegetables from the skillet and set aside.
Heat the remaining 1 tablespoon oil in the same skillet over medium-high heat. Add the chicken and cook until golden brown, 3 to 5 minutes. Add the sausage and vinegar and cook for 1 minute to heat through.
Using tongs, arrange the chicken mixture on the open rolls, top with the fried peppers and serve.
The Verdict: The title of Robin Miller's show is called Quick Fix and this was most certainly a quick fix. If I would've had cooked chicken on hand I would've had dinner done in 15 minutes so I was quite happen with that! The flavor of the balsamic really set this off from anything else similar that I've tried. We both really liked it but also thought the bread needs -something- before the meat goes onto it. It's a little dry otherwise. I also think that this would be good over rice or just by itself too!
Wednesday, April 14, 2010
Brie Stuffed Blackened Chicken
The Food Network Chefs Cooking Challenge has made it's way to Robert Irvine. His show, Dinner: Impossible, looks like it's probably interesting but since I'm not awesome and within the borders of the US, I can't even watch the streams on Food Network! Lame.
Brie Stuffed Blackened Chicken
Courtesy Robert Irvine
Ingredients
Preheat the oven to 350 degrees F.
Cut a 2 to 3-inch pocket in each chicken breast, and insert a wedge of Brie deep into each pocket and is covered with the top of the pocket.
In a large mixing bowl, add all the dried herbs and spices. Add the chicken and gently toss the in the mixture, coating evenly (keeping the cheese in the pocket). In a large skillet over high heat, add oil and sear the chicken on both sides until dark brown, but not burned, normally 3 to 4 minutes on each side. Put the skillet in the oven to bake until cooked through, about 6 to 8 minutes. Remove the chicken from the oven to a cutting board and let rest for 3 to 4 minutes.
The Verdict: I was able to make this recipe exactly as written which doesn't always happen so I was quite pleased! We both liked it a lot and I've added it to my recipe file. I have access to absurdly cheap French cheeses here, but I think mozarella or even blue cheese would be good if you can't get your hands on brie!
Why yes that is the biggest chicken breast you've ever seen. We shared it because it was so massive!
Brie Stuffed Blackened Chicken
Courtesy Robert Irvine
Ingredients
- 6 boneless, skinless chicken breasts
- 3 ounces chilled Brie cheese, divided into 6 wedges, skin-on
- 1 tablespoon paprika
- 1 tablespoon cayenne pepper
- 1/2 tablespoon ground cumin
- 1/8 teaspoon garlic powder
- 1/8 teaspoon onion powder
- 1/2 tablespoon dried thyme
- Pinch salt and freshly ground black pepper
- 1/4 cup grapeseed oil
Preheat the oven to 350 degrees F.
Cut a 2 to 3-inch pocket in each chicken breast, and insert a wedge of Brie deep into each pocket and is covered with the top of the pocket.
In a large mixing bowl, add all the dried herbs and spices. Add the chicken and gently toss the in the mixture, coating evenly (keeping the cheese in the pocket). In a large skillet over high heat, add oil and sear the chicken on both sides until dark brown, but not burned, normally 3 to 4 minutes on each side. Put the skillet in the oven to bake until cooked through, about 6 to 8 minutes. Remove the chicken from the oven to a cutting board and let rest for 3 to 4 minutes.
The Verdict: I was able to make this recipe exactly as written which doesn't always happen so I was quite pleased! We both liked it a lot and I've added it to my recipe file. I have access to absurdly cheap French cheeses here, but I think mozarella or even blue cheese would be good if you can't get your hands on brie!
Wednesday, April 07, 2010
Honey Mustard BBQ Chicken & Butter Bean Salad
I don't really know why so many people hate Rachael Ray. She can be a little obnoxious but she does have some mighty tasty recipes. I was a bit curious to see if I could actually accomplish a "30 Minute Meal" since I'm a bit of a tortoise when it comes to things in the kitchen. Mission accomplished!
Honey Mustard and Red Onion Barbecued Chicken
Courtesy Rachael Ray
Ingredients:
Preheat grill pan or griddle over medium high heat (I cooked this in a skillet but I can see the merits of grilling it).
Pour 2 tablespoons vegetable oil into a small saucepan over moderate heat. Add red onions and saute 3 to 5 minutes. Add vinegar and reduce by half, 1 to 2 minutes. Add brown sugar and cook 1 minute to incorporate. Whisk in broth and honey mustard, allspice and curry. Bring sauce to a bubble and reduce heat to lowest setting.
Coat chicken with a drizzle of oil and salt and pepper, to your taste. Place chicken on hot grill (or skillet of awesomeness) and cook 4 or 5 minutes, then turn. Baste chicken liberally with sauce and cook another 5 minutes. Turn once again and baste. Cook 2 or 3 minutes more to cook through and transfer chicken to a platter and serve.
Butter Bean Salad
Courtesy Rachael Ray
Ingredients:
Directions
Combine all ingredients in a medium bowl. Toss to coat beans and vegetables evenly in dressing.
The Verdict: Four thumbs up! I liked that I didn't have to make a lot of crazy modifications to either of these recipes. The only thing I'd really change about the chicken is I'd possibly use less brown sugar or cut it out completely. The bean salad is easy and FAST and is even better the second day.
Honey Mustard and Red Onion Barbecued Chicken
Courtesy Rachael Ray
Ingredients:
- 2 tablespoons vegetable oil
- 1/2 red onion, chopped
- 1/4 cup apple cider vinegar
- 1/4 cup brown sugar, a couple of handfuls (A couple of handfuls? I would've ended up with like 3 times the recommended amount this way!)
- 1 cup chicken stock
- 1/2 cup prepared honey mustard (recommended: Honey Cup brand) (I did 1/4 cup mustard and 1/4 cup honey)
- 1/2 teaspoon allspice, eyeball it
- 1/2 teaspoon curry powder, eyeball it
- 4 pieces boneless, skinless chicken breast
- 4 boneless, skinless chicken thighs
- Vegetable oil, for drizzling
- Salt and freshly ground black pepper
Preheat grill pan or griddle over medium high heat (I cooked this in a skillet but I can see the merits of grilling it).
Pour 2 tablespoons vegetable oil into a small saucepan over moderate heat. Add red onions and saute 3 to 5 minutes. Add vinegar and reduce by half, 1 to 2 minutes. Add brown sugar and cook 1 minute to incorporate. Whisk in broth and honey mustard, allspice and curry. Bring sauce to a bubble and reduce heat to lowest setting.
Coat chicken with a drizzle of oil and salt and pepper, to your taste. Place chicken on hot grill (or skillet of awesomeness) and cook 4 or 5 minutes, then turn. Baste chicken liberally with sauce and cook another 5 minutes. Turn once again and baste. Cook 2 or 3 minutes more to cook through and transfer chicken to a platter and serve.
*****
Butter Bean Salad
Courtesy Rachael Ray
Ingredients:
- 2 cans butter beans, rinsed and drained, 15 ounces each
- 1/2 red bell pepper, diced (I used yellow because that's what I had!)
- 1/2 green bell pepper, diced
- 1/2 red onion, chopped
- 2 cloves garlic, peeled and minced
- 1 teaspoon ground cumin, 1/3 palm full
- 2 tablespoons extra virgin olive oil
- 1 large lemon, juiced
- Coarse salt and freshly ground black pepper
Directions
Combine all ingredients in a medium bowl. Toss to coat beans and vegetables evenly in dressing.
*****
The Verdict: Four thumbs up! I liked that I didn't have to make a lot of crazy modifications to either of these recipes. The only thing I'd really change about the chicken is I'd possibly use less brown sugar or cut it out completely. The bean salad is easy and FAST and is even better the second day.
Wednesday, March 31, 2010
Avocado Chicken Salad
When you click on this weeks FNCCC chef and then select "low-calorie" or "low-fat" only 10 of over 1200 recipes pop up. Can you guess who it is? Paula Deen! I made her Banana Pudding last fall, so I decided to do a more savory dish this time. I made some alterations, so watch for my notes in italics.
Avocado Chicken Salad
Courtesy Paula Deen
Ingredients
Salad:
3 cups cooked, diced chicken
3 cups cooked white rice
2 avocados, peeled, diced, and tossed with 1 tablespoon lemon juice
3/4 cup chopped onion (I used one very small onion)
1 cup mayonnaise (Since the dressing below also includes 1 cup of mayo, I completely left this out)
1 to 2 teaspoons pepper (I went for a few grinds of freshly ground)
1 teaspoon salt
1/4 cup chopped fresh parsley leaves
Thick, crusty bread, multi-grain or sourdough, for serving
Lemon wedges, for garnish (I'm just not that fancy so I didn't garnish mine with lemons!)
Avocado Dressing:
1 large avocado, peeled and mashed with 2 tablespoons lemon juice
1 cup mayonnaise (I used yogurt mayo and probably only did about 3/4 cup)
1/2 cup sour cream
1/2 teaspoon Worcestershire sauce
1/3 cup chopped onion
2 cloves garlic, minced
1 teaspoon salt
Dash cayenne pepper
Directions
Dressing:
Place all ingredients in a food processor and blend until smooth. Chill and serve alongside chicken salad. (I mixed this in with the salad itself instead of serving on the side)
Salad:
Mix all ingredients and chill. Pass with avocado dressing (again, I mixed the dressing into the salad because I ditched the mayo in the first group of ingredients). Serve on the crusty bread.
THE VERDICT: We both liked this. It's a bit different but not too bad! I think I'll use a bit of vinegar in the dressing next time because it was a little sweeter than I expected. I think that if I'd used regular mayo that wouldn't have been an issue though, so keep that in mind. It also could've been due to the fact that I forgot to salt the dressing and was just salting the salad afterwards.
Wednesday, March 24, 2010
BBQ Nachos
I made Neelys' Barbeque Nachos for the Food Network Chef's Cooking Challenge this week. This really sounded like a strange recipe, but I was really curious so I went for it!
Neelys' Barbeque Nachos
Recipe courtesy The Neelys
Ingredients
1 bag tortilla chips
1/2 cup Neelys Barbecue Seasoning, recipe follows (check the notes on the following recipe)
6 ounces chopped pork, beef or chicken (I used ground beef because it's what I had)
4 ounces Neelys Barbecue Sauce, recipe follows
4 ounces nacho cheese, melted (I made my own)
1 (4-ounce) can sliced jalapeƱos, drained (optional- if your cheese is hot enough you probably don't need these)
Directions
Mound tortilla chips in a pile on a platter. Sprinkle with Neelys Seasoning. Spread chopped pork, beef or chicken on top of chips. Sprinkle with seasoning again and pour the Neelys Barbeque Sauce onto meat. Top with the melted nacho cheese.
Lightly sprinkle more Neely's Barbeque Seasoning onto cheese. Top with jalapeƱos for additional spice.
3/4 cup white sugar
1 1/2 cups paprika
3 3/4 tablespoons onion powder
Mix all ingredients together and store in a tightly sealed container.
I divided this entire recipe by a factor of 6 and that really was enough to sprinkle and have a bit leftover at the end.
2 cups ketchup
1 cup water
1/2 cup apple cider vinegar
5 tablespoons light brown sugar
5 tablespoons sugar
1/2 tablespoon fresh ground black pepper
1/2 tablespoon onion powder
1/2 tablespoon ground mustard
1 tablespoon lemon juice
1 tablespoon Worcestershire sauce
In a large saucepan, combine all ingredients and mix well. Bring mixture to a boil, reduce heat to simmer. Cooked uncovered, stirring frequently every 15 minutes, for 1 hour and 15 minutes.
Yield: 3 1/2 cups
I halved the sauce recipe and it was enough for about 3 servings. I also substituted appropriate amounts of Splenda in place of the sugars. This is a very sweet BBQ sauce.
Hop on over to IBlame Thank My Mother for more FNCCC!
Neelys' Barbeque Nachos
Recipe courtesy The Neelys
Ingredients
1 bag tortilla chips
1/2 cup Neelys Barbecue Seasoning, recipe follows (check the notes on the following recipe)
6 ounces chopped pork, beef or chicken (I used ground beef because it's what I had)
4 ounces Neelys Barbecue Sauce, recipe follows
4 ounces nacho cheese, melted (I made my own)
1 (4-ounce) can sliced jalapeƱos, drained (optional- if your cheese is hot enough you probably don't need these)
Directions
Mound tortilla chips in a pile on a platter. Sprinkle with Neelys Seasoning. Spread chopped pork, beef or chicken on top of chips. Sprinkle with seasoning again and pour the Neelys Barbeque Sauce onto meat. Top with the melted nacho cheese.
Lightly sprinkle more Neely's Barbeque Seasoning onto cheese. Top with jalapeƱos for additional spice.
---
Neelys Barbeque Seasoning:3/4 cup white sugar
1 1/2 cups paprika
3 3/4 tablespoons onion powder
Mix all ingredients together and store in a tightly sealed container.
I divided this entire recipe by a factor of 6 and that really was enough to sprinkle and have a bit leftover at the end.
---
Neelys Barbeque Sauce:2 cups ketchup
1 cup water
1/2 cup apple cider vinegar
5 tablespoons light brown sugar
5 tablespoons sugar
1/2 tablespoon fresh ground black pepper
1/2 tablespoon onion powder
1/2 tablespoon ground mustard
1 tablespoon lemon juice
1 tablespoon Worcestershire sauce
In a large saucepan, combine all ingredients and mix well. Bring mixture to a boil, reduce heat to simmer. Cooked uncovered, stirring frequently every 15 minutes, for 1 hour and 15 minutes.
Yield: 3 1/2 cups
I halved the sauce recipe and it was enough for about 3 servings. I also substituted appropriate amounts of Splenda in place of the sugars. This is a very sweet BBQ sauce.
---
The Verdict: These were surprisingly good! The sweetness of the BBQ sauce with the spice of the cheese actually worked out very well. I imagine you could cut back a tad on the sweetness of the BBQ sauce, but not too much! We both said this would be a good "treat" food because if you ate it too often you'd get awfully sick of it fast, but every now and then it will be great.Hop on over to I
Wednesday, March 17, 2010
Crunchy Pork Chops & Garlicky Spinach Tomato Salad
Nigella Lawson is this week's FNCCC chef! From browsing her recipes, I take it that she really really likes chocolate. There were some really yummy looking dessert recipes but I went another direction and did pork chops instead!
Crunchy Pork Chops with Garlicky Spinach and Tomato Salad
Courtesy Nigella Lawson
Ingredients
Pork chops:
Directions
Trim the thick white fat off the pork chops, cutting carefully around the outside edge. Lay the chops between 2 pieces of plastic wrap and, using a mallet or a rolling pin beat them until the meaty part of the chop is half as thick. You will need to beat around the bone, so turn them over once as you go. I skipped this entire process. My pork chops were already rather lean and quite thin to begin with.
Beat the egg in a shallow wide bowl with the mustard, oregano, and salt and pepper. On a large plate or platter, combine the breadcrumbs with the Parmesan.
Press each of the chops into the egg mixture, coating either side. Then dip the eggy chops (for no reason whatsoever I start giggling every time I read the phrase 'eggy chops') into the bread crumbs, covering them evenly. Let them lie on a cooling rack to dry slightly while you heat the oil in a large frying pan. When a small cube of bread sizzles if dropped into the oil, then the oil is hot enough. Cook the chops until they are a deep golden color, about 5 to 7 (or 3-4) minutes a side (depending on how thin you've managed to get them and how cold they were before going in the oil).
Meanwhile, quarter the tomatoes and take out the seeds, then cut the shells into strips and dice them. You can take off the skins, too, if you prefer, by steeping the tomatoes first into a bowl of just boiled water for 3 to 5 minutes. Combine the diced tomato, minced or grated garlic, oil, and lemon juice in a bowl, and season well with salt and pepper.
When the chops are ready, toss the spinach in the tomato mixture until well coated and divide the salad between 2 large plates, putting each chop alongside.
The Verdict: Both Martijn and I loved these! The outside of the chops was perfectly crispy and the inside was nice and tender. The salad was also wonderful. These also come together REALLY fast. I think I had dinner done in less than 20 minutes which is practically a world record for me. I highly recommend giving this recipe a try!
Hop on over to IBlame Thank My Mother for more FNCCC and Balancing Beauty and Bedlam for more Tasty Tuesday recipes!
P.S. If you missed my new blog design reveal post, go back and check it out! I'm giving away a customized sock monkey to one lucky person.
Crunchy Pork Chops with Garlicky Spinach and Tomato Salad
Courtesy Nigella Lawson
Ingredients
Pork chops:
- 2 pork chops, approximately 8 ounces each (Mine weren't that big, probably closer to 5 oz)
- 1 egg
- 1/2 teaspoon Dijon mustard
- 1/4 teaspoon dried oregano
- Salt and freshly ground black pepper
- 1 cup bread crumbs (You will only need 1 cup of bread crumbs if you also plan on breading yourself along with the pork chops! I used about a half a cup and still had oodles of waste)
- 1 tablespoon freshly grated Parmesan
- 1 cup ground nut oil or similar, for frying (I used 1/4 cup peanut oil and probably still could've used a bit less)
- 3 medium tomatoes
- 1/2 clove garlic, minced
- 1 tablespoon olive oil
- 1 tablespoon lemon juice
- 4 cups baby spinach leaves (I don't think you can even find baby spinach here, so I just used regular)
- Salt and pepper
- I added a sprinkle of freshly grated Parmesan cheese to this too
Directions
Trim the thick white fat off the pork chops, cutting carefully around the outside edge. Lay the chops between 2 pieces of plastic wrap and, using a mallet or a rolling pin beat them until the meaty part of the chop is half as thick. You will need to beat around the bone, so turn them over once as you go. I skipped this entire process. My pork chops were already rather lean and quite thin to begin with.
Beat the egg in a shallow wide bowl with the mustard, oregano, and salt and pepper. On a large plate or platter, combine the breadcrumbs with the Parmesan.
Press each of the chops into the egg mixture, coating either side. Then dip the eggy chops (for no reason whatsoever I start giggling every time I read the phrase 'eggy chops') into the bread crumbs, covering them evenly. Let them lie on a cooling rack to dry slightly while you heat the oil in a large frying pan. When a small cube of bread sizzles if dropped into the oil, then the oil is hot enough. Cook the chops until they are a deep golden color, about 5 to 7 (or 3-4) minutes a side (depending on how thin you've managed to get them and how cold they were before going in the oil).
Meanwhile, quarter the tomatoes and take out the seeds, then cut the shells into strips and dice them. You can take off the skins, too, if you prefer, by steeping the tomatoes first into a bowl of just boiled water for 3 to 5 minutes. Combine the diced tomato, minced or grated garlic, oil, and lemon juice in a bowl, and season well with salt and pepper.
When the chops are ready, toss the spinach in the tomato mixture until well coated and divide the salad between 2 large plates, putting each chop alongside.
The Verdict: Both Martijn and I loved these! The outside of the chops was perfectly crispy and the inside was nice and tender. The salad was also wonderful. These also come together REALLY fast. I think I had dinner done in less than 20 minutes which is practically a world record for me. I highly recommend giving this recipe a try!
Hop on over to I
***
P.S. If you missed my new blog design reveal post, go back and check it out! I'm giving away a customized sock monkey to one lucky person.
Wednesday, March 10, 2010
Chicken Pinwheels
I had to look HARD this week or a recipe that I wanted to make. I'm suffering from "lack of motivation to do anything lately" syndrome. It'll pass, but it's making feeling excited about cooking hard right now. I did actually cook for last week's challenge, but I was suffering from "lack of motivation to post about it" syndrome. It'll go up at some point in the future, because the pictures are sitting here staring me in the face saying "Why didn't you love me enough to post about me?"
Anyhow, now that that blathering is out of the way I'll get to the point! I made Michael Symon's Chicken Pinwheels for the FNCCC this week. I had my eyebrows raised at some of the ingredients (pickles?) but decided to go for it. The recipe is for 8, but I only cooked for the two of us.
Ingredients
8 boneless skinless chicken breasts
6 ounces sliced ham
8 ounces smoked bacon
4 eggs beaten
3 diced pickles (dill, sweet, or sours, your preference)
1/2 cup butter
3 tablespoons flour
2 cups chicken stock
2 tablespoons chopped tarragon (I used dried and added it into the sauce before putting things in the oven instead of as a garnish at the end)
Directions
Place chicken in between plastic wrap and pound out until 1/4-inch thick (I rather enjoy using my meat mallet for such things). Place 1 slice of ham and 1 slice of bacon onto each breast of chicken. Lightly scramble the eggs and let cool. Divide eggs evenly over chicken and spread out. Top with diced pickles and roll into pinwheels. Once chicken is rolled, tie with string to secure (Unwaxed dental floss or... undyed cotton crochet thread works if you don't have kitchen twine). Heat the butter in a saute pan and brown chicken rolls. Remove chicken rolls from the pan and set aside. Add flour to the same saute pan, and cook until light brown. Add the chicken stock, making sure to stir out any lumps. Return chicken to pan and place in a preheated 350 degree oven for 1 hour (I think 1 hour is too long. It might've been because I was only baking two rolls, but I took them out after about 40 minutes and they were well on their way to being VERY dried out). Remove from oven and sprinkle with chopped tarragon. Slice each breast into 4 pieces and serve with 2 tablespoons of sauce.
The Verdict: We both liked these. I was actually suprised how well they turned out. The stock I used was a tad on the salty side, but that's fixable. Also the cooking time needed to be tweaked a little but in all it's a pretty good recipe!
Thanks to Sarah at IBlame Thank My Mother for hosting The Food Network Chef's Challenge every week!
P.S. If you missed my new blog design reveal post, go back and check it out! I'm giving away a customized sock monkey to one lucky person.
Anyhow, now that that blathering is out of the way I'll get to the point! I made Michael Symon's Chicken Pinwheels for the FNCCC this week. I had my eyebrows raised at some of the ingredients (pickles?) but decided to go for it. The recipe is for 8, but I only cooked for the two of us.
Ingredients
8 boneless skinless chicken breasts
6 ounces sliced ham
8 ounces smoked bacon
4 eggs beaten
3 diced pickles (dill, sweet, or sours, your preference)
1/2 cup butter
3 tablespoons flour
2 cups chicken stock
2 tablespoons chopped tarragon (I used dried and added it into the sauce before putting things in the oven instead of as a garnish at the end)
Directions
Place chicken in between plastic wrap and pound out until 1/4-inch thick (I rather enjoy using my meat mallet for such things). Place 1 slice of ham and 1 slice of bacon onto each breast of chicken. Lightly scramble the eggs and let cool. Divide eggs evenly over chicken and spread out. Top with diced pickles and roll into pinwheels. Once chicken is rolled, tie with string to secure (Unwaxed dental floss or... undyed cotton crochet thread works if you don't have kitchen twine). Heat the butter in a saute pan and brown chicken rolls. Remove chicken rolls from the pan and set aside. Add flour to the same saute pan, and cook until light brown. Add the chicken stock, making sure to stir out any lumps. Return chicken to pan and place in a preheated 350 degree oven for 1 hour (I think 1 hour is too long. It might've been because I was only baking two rolls, but I took them out after about 40 minutes and they were well on their way to being VERY dried out). Remove from oven and sprinkle with chopped tarragon. Slice each breast into 4 pieces and serve with 2 tablespoons of sauce.
The Verdict: We both liked these. I was actually suprised how well they turned out. The stock I used was a tad on the salty side, but that's fixable. Also the cooking time needed to be tweaked a little but in all it's a pretty good recipe!
Thanks to Sarah at I
***
P.S. If you missed my new blog design reveal post, go back and check it out! I'm giving away a customized sock monkey to one lucky person.
Wednesday, February 24, 2010
Salmon Cakes & Strawberry Shortcake
We had a combination of chefs this week since they each had very few recipes. I wasn't really able to find a Masaharu Morimoto recipe that looked appealing to me, but I did try a recipe each from Melissa d'Arabian and Mary Nolan.
I'll start with the main course- Salmon Cakes.
Salmon Cakes
Courtesy of Melissa d'Arabian
Ingredients:
Mix the bacon, onion, egg, mayonnaise, mustard, sugar, and lemon zest in a bowl. Add the salmon and potato, mixing gently after each addition. Form the mixture into 12 small patties.
*Okay, at this point I knew something was not "right" with this recipe. I had salmon soup, not something that would be able to be formed into patties. I mixed in some instant potatoes to thicken it up a little, but they still weren't really formable so I decided to scoop the mixture into my muffin pan and bake them instead. I sprinkled some bread crumbs over the top of each "cake" and then grated a little Parmesan onto each. I baked them for about 20 minutes at 175 C (350 F). Below are Melissa's instructions if you have better success than me and want to fry them.
In a shallow dish, combine the bread crumbs, Parmesan, and pepper, to taste. Coat the patties in the bread crumb topping. Heat 1/4 cup of the oil in a large saute pan over medium heat, and cook the salmon cakes in batches until golden, about 3 to 4 minutes per side. Add more oil, as necessary. Arrange on a serving platter and serve.
The Verdict: These tasted FANTASTIC! We both thought they were really good and I was glad I figured out a way to salvage the recipe. I'm going to try it with tuna and see what happens with that.
For dessert I made Mary Nolan's Strawberry Shortcake. I'm not going to post the recipe because to be honest I wasn't -that- enamored with it. It tasted good, but I don't think I'd use that shortcake recipe again. It was a bit too dense. The addition of the lemon zest to the whipped cream was genius though. I'll do THAT part again.
I'll start with the main course- Salmon Cakes.
Salmon Cakes
Courtesy of Melissa d'Arabian
Ingredients:
- 2 strips bacon, cooked until crispy and crumbled, reserve the fat
- 1/4 cup chopped onion
- 1 egg
- 1/2 cup mayonnaise
- 2 tsp Dijon mustard
- 1/2 tsp sugar
- 1/2 lemon, zested
- 1 (14 ounce) can wild salmon, checked for large bones (I've only had one previous experience with canned salmon and it was really terribly unappetizing so I splurged and bought the "no skin and bones" salmon)
- 1 baked or boiled russet potato, peeled and fluffed with a fork
- 1/4 cup bread crumbs (I used herbed bread crumbs because that's what I had handy)
- 2 tbsp grated Parmesan
- 1/2 cup vegetable oil*
Mix the bacon, onion, egg, mayonnaise, mustard, sugar, and lemon zest in a bowl. Add the salmon and potato, mixing gently after each addition. Form the mixture into 12 small patties.
*Okay, at this point I knew something was not "right" with this recipe. I had salmon soup, not something that would be able to be formed into patties. I mixed in some instant potatoes to thicken it up a little, but they still weren't really formable so I decided to scoop the mixture into my muffin pan and bake them instead. I sprinkled some bread crumbs over the top of each "cake" and then grated a little Parmesan onto each. I baked them for about 20 minutes at 175 C (350 F). Below are Melissa's instructions if you have better success than me and want to fry them.
In a shallow dish, combine the bread crumbs, Parmesan, and pepper, to taste. Coat the patties in the bread crumb topping. Heat 1/4 cup of the oil in a large saute pan over medium heat, and cook the salmon cakes in batches until golden, about 3 to 4 minutes per side. Add more oil, as necessary. Arrange on a serving platter and serve.
The Verdict: These tasted FANTASTIC! We both thought they were really good and I was glad I figured out a way to salvage the recipe. I'm going to try it with tuna and see what happens with that.
*****
For dessert I made Mary Nolan's Strawberry Shortcake. I'm not going to post the recipe because to be honest I wasn't -that- enamored with it. It tasted good, but I don't think I'd use that shortcake recipe again. It was a bit too dense. The addition of the lemon zest to the whipped cream was genius though. I'll do THAT part again.
Wednesday, February 17, 2010
Tagliatelle with Pancetta and Parsnips
Mario Batali has TONS of amazing looking recipes. For this week's FNCCC I chose Tagliatelle with Pancetta and Parsnips.
Tagliatelle with Pancetta and Parsnips
Courtesy Mario Batali
Ingredients:
Roll out the pasta dough to the thinnest setting on a pasta machine (flea market find for €3). Cut the dough crosswise into 1/4-inch strips (I just used the cutter on my machine). Place the tagliatelle on a sheet tray that has been dusted with semolina flour (which I strangely actually had in the cupboard), cover with a clean dish towel, and set aside until ready to use.
Bring 6 quarts of water to a boil and add 2 tablespoons of salt (or, ya know, fill up the pan and just dump in some salt).
In a 12 to 14-inch saute pan, cook the pancetta over high heat until it is browned and the fat has been rendered, about 10 minutes. Add the butter (skipped) and parsnips and saute over high heat without shaking the pan too much until they are golden brown and slightly crispy, 5 to 6 minutes. Season, to taste, with salt and pepper, add the parsley, and cook 1 minute longer.
Cook the tagliatelle in the boiling water until tender yet al dente, about 2 minutes. Drain the pasta, reserving some of the cooking water, and add the pasta to the pan with the pancetta and the parsnips. Toss over high heat to coat the pasta, adding pasta cooking water if necessary to keep the sauce form getting too tight (I ended up using about 1/2 a cup of the pasta water for a 1/2 batch of this recipe). Divide equally among 4 heated pasta bowls, grate Parmigiano-Reggiano over the top of each bowl, and serve immediately.
Basic Pasta Dough
(I halved the recipe for 2 people)
3 cups unbleached all purpose flour, plus more, as needed (I used a 2:1 ratio of whole wheat flour and white flour)
4 extra-large eggs
Mound 3 cups of flour in the center of a large wooden cutting board. Make a well in the middle of the flour, add the eggs. Using a fork, beat together the eggs and begin to incorporate the flour starting with the inner rim of the well. As you incorporate the eggs, keep pushing the flour up to retain the well shape (do not worry if it looks messy). The dough will come together in a shaggy mass when about half of the flour is incorporated. (I think this is a lie. It doesn't come together in a shaggy mass when about half the flour is incorporated so I picked it up and kneaded it with my hands until it was a ball)
Start kneading the dough with both hands, primarily using the palms of your hands. Add more flour, in 1/2-cup increments, if the dough is too sticky (sticky was not a problem). Once the dough is a cohesive mass, remove the dough from the board and scrape up any left over dry bits. Lightly flour the board and continue kneading for 3 more minutes (by this time the dough was so dry I was worried I would have a disaster if I didn't intervene. I wet my hands several times as I was kneading to incorporate a little moisture but not so much that I ended up with a soggy goopy mess). The dough should be elastic and a little sticky. Continue to knead for another 3 minutes, remembering to dust your board with flour when necessary. Wrap the dough in plastic wrap and set aside for 20 minutes at room temperature. Roll and form as desired.
Note: Do not skip the kneading or resting portion of this recipe, they are essential for a light pasta.
The Verdict: I loved everything about this recipe. The slight sweetness of the parsnips went really well with the pancetta and the modified pasta was even good! If you needed a really quick dinner I'd just use ready made pasta. Four thumbs up for this one.
Tagliatelle with Pancetta and Parsnips
Courtesy Mario Batali
Ingredients:
- 1 recipe basic pasta dough, recipe follows
- Kosher salt
- 1/4 pound pancetta, or good quality bacon, cut into 1/2-inch cubes (The only pancetta I could find was in really really thin slices, but I think that actually worked better than if it had been in chunks)
- 1 tablespoon unsalted butter (I skipped this and just used the bacon grease instead)
- 1/2 pound parsnips, peeled, halved, and cut into 1/4-inch half moons (omit the thickest part of the ends)
- Freshly ground black pepper
- 1 bunch flat-leaf parsley, finely chopped to yield 1/4 cup
- Parmigiano-Reggiano, for serving
Roll out the pasta dough to the thinnest setting on a pasta machine (flea market find for €3). Cut the dough crosswise into 1/4-inch strips (I just used the cutter on my machine). Place the tagliatelle on a sheet tray that has been dusted with semolina flour (which I strangely actually had in the cupboard), cover with a clean dish towel, and set aside until ready to use.
Bring 6 quarts of water to a boil and add 2 tablespoons of salt (or, ya know, fill up the pan and just dump in some salt).
In a 12 to 14-inch saute pan, cook the pancetta over high heat until it is browned and the fat has been rendered, about 10 minutes. Add the butter (skipped) and parsnips and saute over high heat without shaking the pan too much until they are golden brown and slightly crispy, 5 to 6 minutes. Season, to taste, with salt and pepper, add the parsley, and cook 1 minute longer.
Cook the tagliatelle in the boiling water until tender yet al dente, about 2 minutes. Drain the pasta, reserving some of the cooking water, and add the pasta to the pan with the pancetta and the parsnips. Toss over high heat to coat the pasta, adding pasta cooking water if necessary to keep the sauce form getting too tight (I ended up using about 1/2 a cup of the pasta water for a 1/2 batch of this recipe). Divide equally among 4 heated pasta bowls, grate Parmigiano-Reggiano over the top of each bowl, and serve immediately.
Basic Pasta Dough
(I halved the recipe for 2 people)
3 cups unbleached all purpose flour, plus more, as needed (I used a 2:1 ratio of whole wheat flour and white flour)
4 extra-large eggs
Mound 3 cups of flour in the center of a large wooden cutting board. Make a well in the middle of the flour, add the eggs. Using a fork, beat together the eggs and begin to incorporate the flour starting with the inner rim of the well. As you incorporate the eggs, keep pushing the flour up to retain the well shape (do not worry if it looks messy). The dough will come together in a shaggy mass when about half of the flour is incorporated. (I think this is a lie. It doesn't come together in a shaggy mass when about half the flour is incorporated so I picked it up and kneaded it with my hands until it was a ball)
Start kneading the dough with both hands, primarily using the palms of your hands. Add more flour, in 1/2-cup increments, if the dough is too sticky (sticky was not a problem). Once the dough is a cohesive mass, remove the dough from the board and scrape up any left over dry bits. Lightly flour the board and continue kneading for 3 more minutes (by this time the dough was so dry I was worried I would have a disaster if I didn't intervene. I wet my hands several times as I was kneading to incorporate a little moisture but not so much that I ended up with a soggy goopy mess). The dough should be elastic and a little sticky. Continue to knead for another 3 minutes, remembering to dust your board with flour when necessary. Wrap the dough in plastic wrap and set aside for 20 minutes at room temperature. Roll and form as desired.
Note: Do not skip the kneading or resting portion of this recipe, they are essential for a light pasta.
The Verdict: I loved everything about this recipe. The slight sweetness of the parsnips went really well with the pancetta and the modified pasta was even good! If you needed a really quick dinner I'd just use ready made pasta. Four thumbs up for this one.
Wednesday, February 10, 2010
Jamie Oliver's Lyonnaise Potato Cake
The next stop in our FNCCC journey is Jamie Oliver. Several of his recipes looked good and several made me wonder how many billions of stores I'd have to go to in order to find all of the ingredients! I'd like to try his Homemade Tomato Ketchup at some point, but I had a big bag of potatoes that were on their way out and decided to try the Lyonnaise Potato Cake recipe instead.
Jamie's Lyonnaise Potato Cake
Courtesy Jamie Oliver
Ingredients
9 potatoes, peeled and thickly sliced
Olive oil
2 onions, sliced
Small handful thyme leaves
4 tablespoons balsamic vinegar
Salt and freshly ground black pepper
Directions
Preheat the oven to 400 degrees F (200 degrees/Gas 6).
Bring a large pan of water to the boil, add the potatoes, and parboil them for 3 to 4 minutes. Drain and set aside. Heat some olive oil in a pan and fry the onions gently with the thyme leaves until meltingly soft. Add the balsamic vinegar and remove from heat. Remove onions to a plate.
Using the same pan (no need to wash it), lay half the potatoes in the bottom and season with salt and pepper. Follow with the onions in 1 layer, seasoning again, then the rest of the potatoes. Bake in the preheated oven for about 45 minutes.
The Verdict: These were just okay. I did everything according to the instructions (with the exception of transfering things into a baking dish since none of my pans would actually FIT in my oven). They weren't gross but they weren't all that great, so I probably won't make them again. There are other ways to eat potatoes that I like better and I figure if I'm going to ingest the carbs I might as well enjoy them!
Wednesday, February 03, 2010
Baked Sweet Potato Fries & Avocado Dip
This week's FNCCC chef is Ingrid Hoffmann. I had a hard time choosing which recipe I wanted to make but something about this one grabbed me so I went with it!
Baked Sweet Potato Fries and Avocado Dip
Courtesy Ingrid Hoffmann
Sweet Potato Fries
Ingredients
Preheat your oven to 450 degrees F. Line a baking sheet with aluminum foil (I find parchment works better for stuff like this) and set aside.
Place the sweet potatoes in a large bowl and toss with olive oil until the sweet potatoes are coated. Add the paprika, chili powder, coriander, salt, and pepper; toss to distribute evenly.
Arrange the coated fries in a single layer on the prepared pan. Bake for 20 minutes on the lower rack until the sweet potatoes soften. Transfer the pan to the upper rack of the oven and bake 10 minutes longer, until fries are crispy.
My oven only has one rack, so obviously I didn't switch from the lower to the upper rack. I did use the broiler for the last 10 minutes or so to make them crispy. Unfortunately that was in the mid-afternoon and by dinner they'd turned a little mushy so eat them right away if you want crispy fries!
Avocado Dip
Ingredients:
Serve as a dip for the Sweet Potato Oven Fries.
THE VERDICT: These were good! The dip was also really good, and it tasted even better the second day. I think next time I make it (and there will be a next time) I'll try subbing sour cream (maybe yoghurt) for the mayonnaise. This would make a good chip or veggie dip too. Four thumbs up on this one!
Baked Sweet Potato Fries and Avocado Dip
Courtesy Ingrid Hoffmann
Sweet Potato Fries
Ingredients
- 2 large sweet potatoes, peeled or unpeeled, cut into 4-inch long and 1/4 to 1/2-inch thick fries
- 2 tablespoons olive oil, or more as needed
- 1 teaspoon paprika
- 1/2 teaspoon chili powder
- 1/2 teaspoon ground coriander
- Coarse ground rock salt and freshly ground black pepper, to taste
- Avocado Dip, recipe follows
Preheat your oven to 450 degrees F. Line a baking sheet with aluminum foil (I find parchment works better for stuff like this) and set aside.
Place the sweet potatoes in a large bowl and toss with olive oil until the sweet potatoes are coated. Add the paprika, chili powder, coriander, salt, and pepper; toss to distribute evenly.
Arrange the coated fries in a single layer on the prepared pan. Bake for 20 minutes on the lower rack until the sweet potatoes soften. Transfer the pan to the upper rack of the oven and bake 10 minutes longer, until fries are crispy.
My oven only has one rack, so obviously I didn't switch from the lower to the upper rack. I did use the broiler for the last 10 minutes or so to make them crispy. Unfortunately that was in the mid-afternoon and by dinner they'd turned a little mushy so eat them right away if you want crispy fries!
Avocado Dip
Ingredients:
- 1 avocado
- 1/3 cup mayonnaise
- 1/3 cup cream cheese
- 1 jalapeno, seeded and chopped (I used jarred)
- 2 scallions, white and light green part only, chopped
- 1 lime, juiced
- Salt and freshly ground black pepper
Serve as a dip for the Sweet Potato Oven Fries.
THE VERDICT: These were good! The dip was also really good, and it tasted even better the second day. I think next time I make it (and there will be a next time) I'll try subbing sour cream (maybe yoghurt) for the mayonnaise. This would make a good chip or veggie dip too. Four thumbs up on this one!
Wednesday, January 27, 2010
Herb Baked Eggs
Before we got married and actually lived in the same time zone, I would talk to Martijn on MSN while he was getting ready to go to work in the morning and I was getting ready for bed at night. One day he told me he was running back and forth between the kitchen and the computer because he was making his breakfast. Naturally I asked him what he was making for breakfast. Here is an approximation of the conversation that followed.
You see, the Dutch word for fried is gebakken. The Dutch word for baked is also gebakken. NOW the whole conversation was rather funny, but at the time the concept of a baked egg was quite baffling. Since then, the baked egg has been a bit of a joke between us. That's how I knew I HAD to choose Ina Garten's Herb Baked Eggs for this week's FNCCC! To round off the meal I also made the Endive, Pear, and Blue Cheese Salad.
Herb Baked Eggs
Courtesy Ina Garten
Ingredients:
Preheat the broiler for 5 minutes and place the oven rack 6 inches below the heat (I couldn't really be that specific with where the rack was because my oven has one place for a rack and that's where it was).
Combine the garlic, thyme, rosemary, parsley, and Parmesan and set aside. Carefully crack 3 eggs into each of 2 small bowls or teacups (you won't be baking them in these) without breaking the yolks. (It's very important to have all the eggs ready to go before you start cooking.)
Place 2 individual gratin dishes (a ramekin would work too) on a baking sheet. Place 1 tablespoon of cream and 1/2 tablespoon of butter in each dish and place under the broiler for about 3 minutes, until hot and bubbly. Quickly, but carefully, pour 3 (or two) eggs into each gratin dish and sprinkle evenly with the herb mixture, then sprinkle liberally with salt and pepper (I think that Parmesan cheese is pretty salty so I didn't add any extra salt). Place back under the broiler for 5 to 6 minutes, until the whites of the eggs are almost cooked. Rotate the baking sheet once if they aren't cooking evenly (My broiler has a hot spot so I moved them about three times so they wouldn't scorch). The eggs will continue to cook after you take them out of the oven. Allow to set for 60 seconds and serve hot with toasted bread.
Endive, Pear, and Blue Cheese Salad
Courtesy Ina Garten
Ingredients
Trim off the core end of each head of endive and slice it in half lengthwise. Cut out the cores, separate the leaves, and place 1 1/2 to 2 heads of endive on each plate.
In a medium bowl, whisk together the vinegar, mustard, egg yolk, salt, and pepper. Slowly whisk in the olive oil to make an emulsion (I swear this is magic. Make sure not to add the oil too fast or it will break and you'll be disappointed in the lack of magic). Toss the pears with some vinaigrette and place on the endive. Drizzle the remaining vinaigrette over the endive leaves to moisten them. Crumble the blue cheese onto the endive. Sprinkle with walnuts and serve at room temperature.
THE VERDICT: I thought that the herbs in the eggs all worked really well together! Broiling the eggs like that made the whites firm but the yolks runny which is perfect for dipping your toast into. The pear salad was yummy too. I think that endive is a little bitter for my tastes, but the sweetness of the pears and the dressing really offset that. Make sure that you use really juicy ripe pears. Both recipes are very good and I'd recommend them!
M: Baked eggs!
Me: Baked eggs?
M: Yah!
Me: How do you bake an egg?
M: You know, in a pan on the stove...
Me: OH! A FRIED egg!
You see, the Dutch word for fried is gebakken. The Dutch word for baked is also gebakken. NOW the whole conversation was rather funny, but at the time the concept of a baked egg was quite baffling. Since then, the baked egg has been a bit of a joke between us. That's how I knew I HAD to choose Ina Garten's Herb Baked Eggs for this week's FNCCC! To round off the meal I also made the Endive, Pear, and Blue Cheese Salad.
*****
Herb Baked Eggs
Courtesy Ina Garten
Ingredients:
- 1/4 teaspoon minced fresh garlic
- 1/4 teaspoon minced fresh thyme leaves
- 1/4 teaspoon minced fresh rosemary leaves
- 1 tablespoon minced fresh parsley
- 1 tablespoon freshly grated Parmesan
- 6 extra-large eggs*
- 2 tablespoons heavy cream (I just used evaporated milk)
- 1 tablespoon unsalted butter
- Kosher salt and freshly ground black pepper
- Toasted French bread or brioche (Or just plain old toast), for serving
Preheat the broiler for 5 minutes and place the oven rack 6 inches below the heat (I couldn't really be that specific with where the rack was because my oven has one place for a rack and that's where it was).
Combine the garlic, thyme, rosemary, parsley, and Parmesan and set aside. Carefully crack 3 eggs into each of 2 small bowls or teacups (you won't be baking them in these) without breaking the yolks. (It's very important to have all the eggs ready to go before you start cooking.)
Place 2 individual gratin dishes (a ramekin would work too) on a baking sheet. Place 1 tablespoon of cream and 1/2 tablespoon of butter in each dish and place under the broiler for about 3 minutes, until hot and bubbly. Quickly, but carefully, pour 3 (or two) eggs into each gratin dish and sprinkle evenly with the herb mixture, then sprinkle liberally with salt and pepper (I think that Parmesan cheese is pretty salty so I didn't add any extra salt). Place back under the broiler for 5 to 6 minutes, until the whites of the eggs are almost cooked. Rotate the baking sheet once if they aren't cooking evenly (My broiler has a hot spot so I moved them about three times so they wouldn't scorch). The eggs will continue to cook after you take them out of the oven. Allow to set for 60 seconds and serve hot with toasted bread.
*****
Endive, Pear, and Blue Cheese Salad
Courtesy Ina Garten
Ingredients
- 4 to 6 heads of Belgian endive (This is witlof in Dutch)
- 1 1/2 tablespoons Champagne vinegar or white wine vinegar
- 3/4 teaspoon Dijon mustard
- 1 egg yolk, at room temperature
- 3/4 teaspoon kosher salt
- 1/2 teaspoon freshly ground black pepper
- 6 tablespoons good olive oil
- 2 ripe Bartlett pears, halved, cored, and sliced
- 1/4 pound good Roquefort cheese (I used Danish Blue since it's a little milder and not nearly as expensive)
- 1/2 cup toasted walnut halves
Trim off the core end of each head of endive and slice it in half lengthwise. Cut out the cores, separate the leaves, and place 1 1/2 to 2 heads of endive on each plate.
In a medium bowl, whisk together the vinegar, mustard, egg yolk, salt, and pepper. Slowly whisk in the olive oil to make an emulsion (I swear this is magic. Make sure not to add the oil too fast or it will break and you'll be disappointed in the lack of magic). Toss the pears with some vinaigrette and place on the endive. Drizzle the remaining vinaigrette over the endive leaves to moisten them. Crumble the blue cheese onto the endive. Sprinkle with walnuts and serve at room temperature.
*****
THE VERDICT: I thought that the herbs in the eggs all worked really well together! Broiling the eggs like that made the whites firm but the yolks runny which is perfect for dipping your toast into. The pear salad was yummy too. I think that endive is a little bitter for my tastes, but the sweetness of the pears and the dressing really offset that. Make sure that you use really juicy ripe pears. Both recipes are very good and I'd recommend them!
Wednesday, January 20, 2010
Cuban Pork Chops & Sofrito Mashed Potatoes
I must confess, I have no idea who Guy Fieri is. He wasn't on Food Network when I was in a place to watch it, but he does seem to have some good looking dishes. This week, I got really ambitious and did TWO recipes for the FNCCC; Cuban Pork Chops with Mojo and Sofrito Mashed Potatoes.
Cuban Pork Chops with Mojo
Courtesy Guy Fieri
Ingredients
*I used the full amount of spices listed in the recipe (well, cut in half for two chops) and there was oodles left over. I think you could safely cut the recipe in half and still have enough for 4-6 chops.
Directions
In a gallon-sized resealable plastic bag, combine 1 cup orange juice, 1/2 cup lime juice, and vinegar. Add pork and let it sit and marinate for about 1 hour in refrigerator (I poured the marinade over frozen pork chops and let it thaw in the juice).
In a small mixing bowl, combine all dried spices. Pat the pork chops dry with a paper towel and rub with the dry spice mixture.
Heat oil in a large saute pan over high heat. Place the pork chops in the pan and sear on 1 side until brown. Flip over and turn the heat down to medium-low. Add onion and saute for 2 minutes. Then add the garlic and continue to cook until garlic begins to brown. Pour in the remaining 1/4 cup orange juice, 1/4 cup lime juice, and white wine. Simmer until the liquid is slightly reduced and begins to thicken. The chops should be cooked through.
Remove the chops from pan and put on a warm plate. Continue to reduce juices in pan by half. Pour over the chops and serve immediately.
Garnish with watercress, tomatoes and avocado (Garnish? We don't need no stinkin garnish!).
Sofrito Mashed Potatoes
Courtesy Guy Fieri
Ingredients
Directions
Fill a large pot with water, salt (I didn't salt the water, but if you do, I don't really suggest that you use TWO TABLESPOONS of salt to do it with)and potatoes and bring to boil. Cook until fork tender.
Meanwhile, heat oil in a medium sauce pot over medium heat. When oil is hot add onions and peppers and saute for 3 minutes. Add the garlic and cook until it begins to brown. Lower the heat and add tomato paste and stir for 3 to 5 minutes. Deglaze with white wine and reduce by half.
Add tomato sauce (or cheater thinned out tomato paste) and bring to simmer for 5 minutes. Then stir in butter and cream and set aside, covered to keep warm.
When potatoes are fork tender, drain water and mash slowly adding the sofrito mixture. Season with salt and pepper and garnish with cilantro.
The Verdict: Aside from the fact that the potato recipe called for FIVE tablespoons of salt for 4-6 servings, it's a pretty great recipe. I wouldn't think to add tomatoes to mashed potatoes but it actually worked out really well. The pork chops were absolutely fabulous too. I loved the tang that the marinade gave to the meat and the spice rub (with the salt adjustments) was just right with those flavors. Martijn nodded and mumbled his approval too while he was shoveling dinner into his mouth. I would recommend both of these recipes to anyone. The best part was that if you don't count the marinating time for the pork chops, dinner only took about a half an hour to make!
Cuban Pork Chops with Mojo
Courtesy Guy Fieri
Ingredients
- 1 cup plus 1/4 cup orange juice, divided
- 1/2 cup plus 1/4 cup fresh lime juice, divided
- 1/4 cup vinegar
- 4 (1-inch-thick) bone-in pork chops (My chops weren't this thick, I just cooked them for a shorter amount of time)
- 1 tablespoon black pepper (I just did a few grinds of freshly ground black pepper)
- 2 tablespoons kosher salt (Again with the insane amounts of salt. I'd use maybe one TEASPOON of salt here.)
- 1 1/2 teaspoons ground cumin*
- 1 tablespoon garlic powder*
- 1 tablespoon onion powder*
- 1 tablespoon dried oregano*
- 3 tablespoons canola oil
- 1/4 cup chopped red onion
- 2 cloves garlic, chopped
- 1/4 cup white wine (I think you could just get away with water or chicken stock here)
- 1 cup watercress, for garnish (I figured since this was just for garnish I'd leave it out)
- 1 Roma tomato, chopped, for garnish (Skipped)
- 1/2 avocado, sliced, for garnish (The only reason I didn't skip on this was because I had an avocado that was on it's last legs and needed to be used)
*I used the full amount of spices listed in the recipe (well, cut in half for two chops) and there was oodles left over. I think you could safely cut the recipe in half and still have enough for 4-6 chops.
Directions
In a gallon-sized resealable plastic bag, combine 1 cup orange juice, 1/2 cup lime juice, and vinegar. Add pork and let it sit and marinate for about 1 hour in refrigerator (I poured the marinade over frozen pork chops and let it thaw in the juice).
In a small mixing bowl, combine all dried spices. Pat the pork chops dry with a paper towel and rub with the dry spice mixture.
Heat oil in a large saute pan over high heat. Place the pork chops in the pan and sear on 1 side until brown. Flip over and turn the heat down to medium-low. Add onion and saute for 2 minutes. Then add the garlic and continue to cook until garlic begins to brown. Pour in the remaining 1/4 cup orange juice, 1/4 cup lime juice, and white wine. Simmer until the liquid is slightly reduced and begins to thicken. The chops should be cooked through.
Remove the chops from pan and put on a warm plate. Continue to reduce juices in pan by half. Pour over the chops and serve immediately.
Garnish with watercress, tomatoes and avocado (Garnish? We don't need no stinkin garnish!).
*****
Sofrito Mashed Potatoes
Courtesy Guy Fieri
Ingredients
- 2 tablespoons salt (Does this seem excessive to you? I skipped it completely)
- 2 pounds potatoes (recommended: Yukon gold)
- 3 tablespoons canola oil
- 1/4 cup chopped red onions
- 1 red bell pepper, chopped (I used a yellow bell pepper for both green and red)
- 1/2 green pepper, chopped
- 3 tablespoons chopped garlic
- 2 tablespoons tomato paste
- 1/4 cup white wine
- 3 ounces tomato sauce (I didn't want to open a box of tomato sauce for such a small amount so I just thinned out the remainder of the can of tomato paste which actually worked out perfectly)
- 3 tablespoons unsalted butter
- 1/2 cup heavy cream (I substituted evaporated milk for the cream)
- 3 tablespoons salt (Uh, really? Skip this too. Salt the potatoes to taste after you're done making them)
- Salt and pepper (MORE SALT! YAH!)
- 2 tablespoons chopped cilantro leaves (I realized I didn't have any fresh so I sprinkled in a teaspoon or so of dry into the sauce)
Directions
Fill a large pot with water, salt (I didn't salt the water, but if you do, I don't really suggest that you use TWO TABLESPOONS of salt to do it with)and potatoes and bring to boil. Cook until fork tender.
Meanwhile, heat oil in a medium sauce pot over medium heat. When oil is hot add onions and peppers and saute for 3 minutes. Add the garlic and cook until it begins to brown. Lower the heat and add tomato paste and stir for 3 to 5 minutes. Deglaze with white wine and reduce by half.
Add tomato sauce (or cheater thinned out tomato paste) and bring to simmer for 5 minutes. Then stir in butter and cream and set aside, covered to keep warm.
When potatoes are fork tender, drain water and mash slowly adding the sofrito mixture. Season with salt and pepper and garnish with cilantro.
*****
The Verdict: Aside from the fact that the potato recipe called for FIVE tablespoons of salt for 4-6 servings, it's a pretty great recipe. I wouldn't think to add tomatoes to mashed potatoes but it actually worked out really well. The pork chops were absolutely fabulous too. I loved the tang that the marinade gave to the meat and the spice rub (with the salt adjustments) was just right with those flavors. Martijn nodded and mumbled his approval too while he was shoveling dinner into his mouth. I would recommend both of these recipes to anyone. The best part was that if you don't count the marinating time for the pork chops, dinner only took about a half an hour to make!
Wednesday, January 13, 2010
Smoked Salmon BLT
This week, I'm going to tell you what the verdict of the Giada De Laurentiis FNCCC recipe was before I even tell you what it is. It was so good that we ate it all before I took a picture. It looked like a regular sandwich though, so you're probably not missing much by not having a picture.
I chose the Smoked Salmon BLT. I chose it because I couldn't see how it could possibly go wrong, which was a good thing considering the GREAT week I've been having. Luckily I was right, and I'm saving this for a "HELP I NEED A FAST DINNER" option.
Smoked Salmon BLT
Courtesy Giada De Laurentiis
Ingredients
(I didn't really measure anything aside from the mayo mixture.)
In a medium skillet over medium-high heat, cook the bacon until crispy, about 3 to 4 minutes on each side. Remove from the skillet and drain on paper towels.
In a small bowl, combine the mayonnaise, lemon zest, lemon juice, and fresh dill. Spread the lemon mayonnaise over 1 side of each slice of bread. Arrange the smoked salmon on 4 slices of the bread. Break the bacon in half and put on top of the smoked salmon. Top the bacon with 1/2 cup of arugula and arrange 2 to 3 tomato slices on top of the arugula. Cover with remaining slices of bread, lemon mayonnaise side down.
The Verdict (again): You should make these. They're delicious and take about 5 minutes. Martijn said he very much approved! I served them with homemade tomato soup.
P.S. I'm giving away a magicJack to a lucky reader! Go check out this post for info!
I chose the Smoked Salmon BLT. I chose it because I couldn't see how it could possibly go wrong, which was a good thing considering the GREAT week I've been having. Luckily I was right, and I'm saving this for a "HELP I NEED A FAST DINNER" option.
Smoked Salmon BLT
Courtesy Giada De Laurentiis
Ingredients
(I didn't really measure anything aside from the mayo mixture.)
- 4 slices thick cut bacon
- 1/4 cup mayonnaise
- 1 teaspoon lemon zest
- 1 teaspoon fresh lemon juice
- 2 tablespoons chopped fresh dill leaves
- 8 (1/2-inch thick) slices multigrain bread (I just used these little multigrain bake at home breads... they're sorta shaped like ciabatta and they work really well for the "special" sandwiches in my life)
- 6 ounces smoked salmon
- 1 cup arugula, divided
- 2 large or 3 medium tomatoes, sliced
In a medium skillet over medium-high heat, cook the bacon until crispy, about 3 to 4 minutes on each side. Remove from the skillet and drain on paper towels.
In a small bowl, combine the mayonnaise, lemon zest, lemon juice, and fresh dill. Spread the lemon mayonnaise over 1 side of each slice of bread. Arrange the smoked salmon on 4 slices of the bread. Break the bacon in half and put on top of the smoked salmon. Top the bacon with 1/2 cup of arugula and arrange 2 to 3 tomato slices on top of the arugula. Cover with remaining slices of bread, lemon mayonnaise side down.
The Verdict (again): You should make these. They're delicious and take about 5 minutes. Martijn said he very much approved! I served them with homemade tomato soup.
P.S. I'm giving away a magicJack to a lucky reader! Go check out this post for info!
Tuesday, January 05, 2010
Homemade Herb Cheese
We took a FNNCC vacation last week, but we’re back into the swing of things again this week! The chef is George Duran from the show Ham on the Street. From what I read on the website, it looks like a rather interesting show, but since we’re Food Networkless here in the land of clogs, windmills and cheese, I don’t know if it’s actually any good! Has anyone seen it?
There were a bunch of recipes that looked like a lot of fun so I have some bookmarked to try later, but the one I eventually settled on for the challenge was George’s Mom’s Homemade Herb Cheese. As with the cottage cheese I made for the Alton Brown challenge, the cooking time of 5 minutes is completely insane. I don’t know how to get your milk hot enough that fast without starting it on fire!! I halved the recipe because I wasn't sure if it would be tasty and I didn't want a giant wheel of cheese just to go to waste!
George’s Mom’s Homemade Herb Cheese
Courtesy George Duran
Ingredients:
(Things you also need that aren't mentioned and might be useful to think about beforehand are a container you can make holes in for the cheese and a thermometer to know when your milk reaches the right temperature)
Drill holes into the bottom of a round plastic storage container approximately 6 inches wide and at least 4 inches high (I used an old yogurt bucket), and set aside. Line a colander with cheesecloth and set aside.
Put the milk and half-and-half into a large pot over medium heat and cook, stirring frequently, until it reaches 195 degrees F. There will be a slight simmer and the top will be very foamy (This took about a half hour on medium heat on my stove). Remove from the heat and slowly stir in the vinegar. Put the colander into the sink and pour this mixture into the cheesecloth. When most of the liquid has passed through, add the tomatoes, basil, and salt and stir gently to incorporate. Gather up the ends of the cheesecloth and transfer the cheese to the plastic container. Set the container on a rack on a sheet pan to catch the whey. Put a plate on top and weight it down with some heavy cans to squeeze out the excess liquid. Let rest for 1 hour, remove the cheesecloth, and return it to the plastic container with the plates and weights. Put it into the refrigerator overnight. To serve, put the cheese onto a plate and brush with a little olive oil (oops, forgot this part)
The Verdict: I took this to a New Year's Eve party and everyone seemed to like it. I didn't add enough salt (which was totally my fault because I didn't use the amount called for in the recipe) but it didn't RUIN it... just made it a little less flavorful. I was impressed with how firm it got, but it is still a little crumbly so be aware of that if you try it. This is a keeper, and I think it will be fun to play with different goodies mixed in.
There were a bunch of recipes that looked like a lot of fun so I have some bookmarked to try later, but the one I eventually settled on for the challenge was George’s Mom’s Homemade Herb Cheese. As with the cottage cheese I made for the Alton Brown challenge, the cooking time of 5 minutes is completely insane. I don’t know how to get your milk hot enough that fast without starting it on fire!! I halved the recipe because I wasn't sure if it would be tasty and I didn't want a giant wheel of cheese just to go to waste!
George’s Mom’s Homemade Herb Cheese
Courtesy George Duran
Ingredients:
- 1 gallon whole milk
- 1 pint half-and-half (I used evaporated milk- koffiemelk for NL folks)
- 1 cup white vinegar (Oh white vinegar, is there anything you can't do?)
- 1/2 cup chopped sun-dried tomatoes, not in oil
- 1/4 cup chopped fresh basil leaves
- 1 tablespoon kosher salt
- Extra-virgin olive oil, to serve (I sorta forgot this)
(Things you also need that aren't mentioned and might be useful to think about beforehand are a container you can make holes in for the cheese and a thermometer to know when your milk reaches the right temperature)
Drill holes into the bottom of a round plastic storage container approximately 6 inches wide and at least 4 inches high (I used an old yogurt bucket), and set aside. Line a colander with cheesecloth and set aside.
Put the milk and half-and-half into a large pot over medium heat and cook, stirring frequently, until it reaches 195 degrees F. There will be a slight simmer and the top will be very foamy (This took about a half hour on medium heat on my stove). Remove from the heat and slowly stir in the vinegar. Put the colander into the sink and pour this mixture into the cheesecloth. When most of the liquid has passed through, add the tomatoes, basil, and salt and stir gently to incorporate. Gather up the ends of the cheesecloth and transfer the cheese to the plastic container. Set the container on a rack on a sheet pan to catch the whey. Put a plate on top and weight it down with some heavy cans to squeeze out the excess liquid. Let rest for 1 hour, remove the cheesecloth, and return it to the plastic container with the plates and weights. Put it into the refrigerator overnight. To serve, put the cheese onto a plate and brush with a little olive oil (oops, forgot this part)
The Verdict: I took this to a New Year's Eve party and everyone seemed to like it. I didn't add enough salt (which was totally my fault because I didn't use the amount called for in the recipe) but it didn't RUIN it... just made it a little less flavorful. I was impressed with how firm it got, but it is still a little crumbly so be aware of that if you try it. This is a keeper, and I think it will be fun to play with different goodies mixed in.
Wednesday, December 23, 2009
Ugly Roasted Garlic and Onion Soup
The chef for this weeks FNCCC this week is Emeril Lagasse. There are more than 5000 of his recipes to choose from, and I think that 4999 of them either have prohibitively expensive ingredients or ingredients that I can't find here. That's not totally true, but most of the ones I thought looked good had one or two ingredients that were integral to the recipe that I wouldn't be able to get. I'm totally willing to do substitutions, but in most cases nothing I would've subbed would've stayed true to the recipe.
I finally found something that I thought I could handle- soup. What I didn't know was that it was ugly soup. Really ugly soup. There seems to be a reason that this soup didn't have a picture on the website. It's just that ugly. Tricky camera angles and editing have made it slightly less ugly, but I'm really not lying.
Ugly Roasted Garlic and Onion Soup
Recipe from "New New Orleans Cooking", by Emeril Lagasse and Jessie Tirsch, published by William and Morrow, 1993.
Ingredients
4 to 6 large red onions (3 1/2 pounds), quartered
Cloves from 2 large heads of garlic (about 1 cup), peeled
2 shallots (about 1/3 cup), peeled
2 tablespoons olive oil
2 tablespoons Essence, recipe follows
6 cups chicken stock (I used water and veggie bullion)
2 teaspoons finely chopped fresh sage leaves (I used about 1/2 tsp dried)
2 teaspoons finely chopped fresh thyme leaves (I used about 1/2 tsp dried)
3/4 teaspoon salt (skipped this, the bullion powder has enough salt and the reviews on foodnetwork.com indicated it didn't need it)
2 teaspoons balsamic vinegar
1/2 cup cream (I used evaporated milk to cut down on the calories a little)
Directions
Preheat oven to 400 degrees F.
Combine the onions, garlic, and shallots in a roasting pan just large enough to hold them in a single layer. Add the olive oil and Essence and toss to coat. Roast until well browned, about 1 1/2 hours (1 1/2 hours would've left me with smoldering cinders in the bottom of the pan. I did 45 minutes and even then there was a lot of charring. If you want to roast the garlic and onions for 1 1/2 hours then drop the heat).
Remove the pan from the oven and set over 2 burners on medium-low heat . Add 2 cups of chicken stock, sage, thyme and salt. Cook for 10 minutes, scraping the bottom of the pan with a wooden spoon to incorporate any of the caramelized bits from the bottom. (I have a flat top stove, so putting the roasting pan on the burners wouldn't work very well. Instead I poured 2 cups of boiling water over the top and scraped up all the good bits from the bottom of the pan. I then transfered it to a stock pot and did the 10 minutes of cooking there)
Transfer the mixture to a blender and puree until smooth, about 2 minutes (or use your magical wondrous stick blender).
Transfer the mixture to a large pot over medium-low heat (or not, depending on how you do things). Add remaining 4 cups chicken stock and balsamic vinegar, and stir to combine. Bring to a simmer and stir in cream. Serve with French bread.
Emeril's ESSENCE Creole Seasoning (also referred to as Bayou Blast):
* 2 1/2 tablespoons paprika
* 2 tablespoons salt
* 2 tablespoons garlic powder
* 1 tablespoon black pepper
* 1 tablespoon onion powder
* 1 tablespoon cayenne pepper
* 1 tablespoon dried oregano
* 1 tablespoon dried thyme
Combine all ingredients thoroughly.
Yield: 2/3 cup
(Put the rest it in a nice shaker jar)
The Verdict: This was way spicier than I had expected, but not in a bad way. I think if you left out or changed up some of the spices it'd make a really good base for some sort of beef stew.
Martijn thought it resembled Gulash the way it's being served in the Czech Republic and Hungary. He also said it's not ugly, but reminded him of the wonderful goodness that he got served during his holidays there.
Tuesday, December 15, 2009
Crab Salad in Wonton Cups
For this week's FNCCC the chef is Ellie Krieger. She had quite a lot of tasty looking recipes but I finally settled on Crab Salad in Crisp Wonton Cups because I needed something to take along to a NAWC potluck and I had wonton wrappers in the freezer.
Crab Salad in Crisp Wonton Cups
Courtesy Ellie Krieger
For the Wonton Cups:
Cooking spray (Didn't use this, you're already oiling the wrappers, I don't think you need to oil the pans too)
18 wonton wrappers, thawed (if frozen)
2 teaspoons canola oil (I used sunflower oil)
1/4 teaspoon salt (I used my salt grinder and just ground a bit of Real Salt on each)
For the dressing:
1 teaspoon lime zest
2 tablespoons fresh lime juice (I just used all the juice from the one lime that I zested. I figure it was close enough!)
1/4 teaspoons salt (Just ground in salt to taste)
1/8 teaspoon black pepper (You'll be happier if you use freshly ground pepper)
1/2 teaspoon dried hot red pepper flakes
2 tablespoons olive oil
For the salad:
1/2 pound lump crabmeat, picked over (Since I'm not a gazillionare I used surimi sticks (aka "krab") and it worked brilliantly)
1 stalk celery, finely diced
1/2 cup finely diced mango
1/4 cup thinly sliced scallions (regular old green onions)
2 tablespoons coarsely chopped fresh cilantro leaves
Preheat the oven to 375 degrees F. Spray 2 mini-muffin (I used regularly sized ones and skipped the cooking spray) tins with cooking spray.
Brush the wonton wrappers with oil, and place each wrapper into a section of a mini-muffin tin. Gently press each wrapper into the tin and arrange so that it forms a cup shape. The wrapper will overlap itself and stick up out of the cup. Sprinkle with salt and bake for 8 to 10 minutes, until browned and crisp. Remove from the tin and allow wrappers to cool.
Meanwhile whisk together the zest, lime juice, salt, pepper, and pepper flakes. Add the oil and whisk until well combined.
In a medium bowl, toss together the crabmeat, celery, mango, scallion and cilantro. Add dressing and toss to combine. Fill each cup with the crab salad and serve.
The Verdict:I used two wonton wrappers for each since I used a full size muffin pan. Lay one down straight and another on top at a 45 degree angle and press them into the tin. I had a lot of salad leftover after I was done filling the wrappers AND I did full sized cups so more filling would fit in them. Also, these were good on the first day, but I think making the salad a day in advance would make them even better! They got rave reviews at the potluck. The only thing I didn't like about this was cutting up the mango. Stupid mango pits.