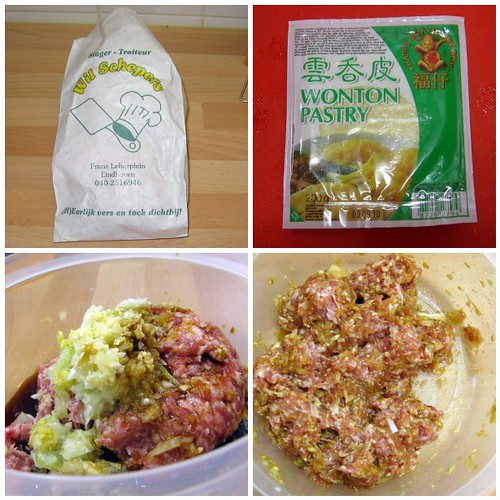
I buy my won ton wrappers from one of the oriental stores here. They are usually in the frozen section, and cost anywhere between 1-1.50€ (200g package). They do have round "pot sticker" wrappers, but I haven't found those here and the square ones work just fine. You can make your own, but unless you've got a pasta machine that can roll things really thin, I don't recommend it. It's a -lot- of work. I bought the pork from the local butcher. Ground beef will work too, but I like the taste of pork better in these. I've used half and half (which is readily available in the regular supermarkets here), but again, I prefer all pork.
You will need:
250 grams (approx 1/2 lb) ground pork
1/2 onion
2 garlic cloves
1" fresh ginger
2 tbsp soy sauce
1 tbsp sesame oil
25ish won ton wrappers
Gather up your ingredients. Laugh at the funny picture on the bag from the butcher.
Mince the garlic, grate the ginger, and mince the onions. If you have a food processor or chopper, I highly recommend using it since you want things to be quite small. Mix the pork, garlic, ginger, onions, sesame oil and soy sauce together. It's best if you let it sit for an hour or so before you continue, but if you're really hungry you can just go ahead ;)
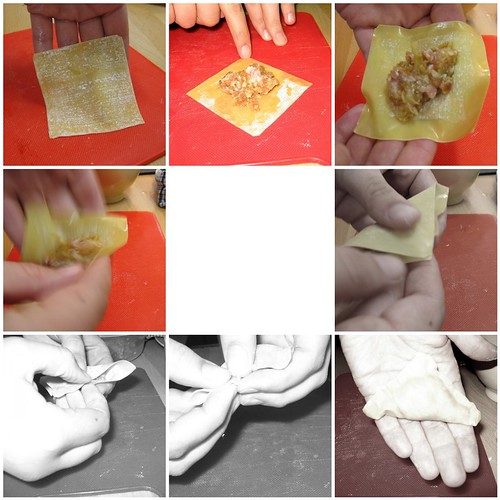
Fill a small dish with some water. You're going to use this to moisten the outer edges of the won ton wrapper so that it'll seal properly. Pull out one of the wrappers and put about a tablespoon of the filling in. You don't want to overfill them because they might come unsealed when you're boiling them later. Wet your finger and run it around the outside edge of the wrapper. Fold it in half so that it becomes a triangle, and pinch the edges closed. Make sure it's sealed well.
Put the assembled pot sticker on a plate and cover with a towel. Continue the process until you've used all of your meat mixture. This recipe will make about 25, give or take a few.
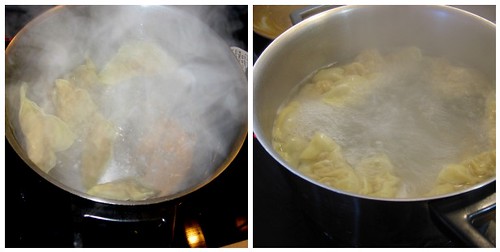
Fill a good sized pot with water and bring to a boil. Drop the pot stickers in the water 5 or 6 at a time. I wait until they float to the top and then cook another minute or two. Remove the pot stickers from the boiling water with a slotted spoon (let the water drip off) and continue the process until all of them are cooked.
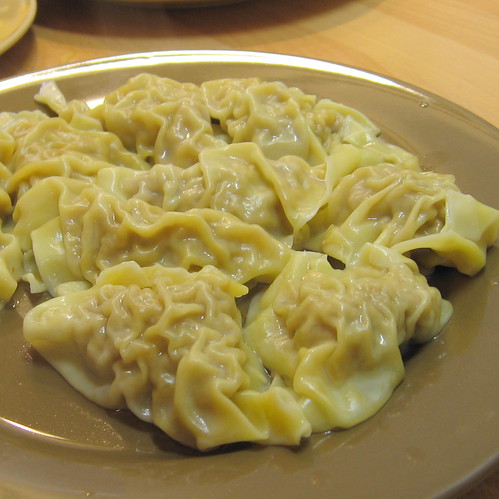
If you've sealed your pot stickers properly, they'll come out of the pan looking like this:
If you didn't seal them properly, they'll come out of the pan looking like this:
See? They're a little floppy and waterlogged. They'll taste still taste okay, but if you choose to fry them they're a little more fiddly to deal with and tend to fall apart.
Finally, if you choose, you can fry them in some vegetable or sesame oil until the outsides are just slightly browned. I usually skip this step because they are really good without it, but if you like crunchy pot stickers then go ahead.
There are lots and lots of recipes online for dipping sauces, but I think if you put the right ingredients inside them you don't need the extra sauce.
If you want to get really creative, you can try these different methods of folding the wrappers.
*****
This week P is for potstickers! Make sure to go check out the other fantastic participants by clicking on the picture below!


No comments:
Post a Comment