
Some time ago, we did laundry and as Martijn was putting the pillowcase on the pillow, his hand went right through it. It was so threadbare it really sortof just disintegrated in his fingers. We like to keep two pillowcases on the pillows to keep the pillows slightly less gross from head sweat, so I figured I'd just make a couple new inner cases and things would be great.
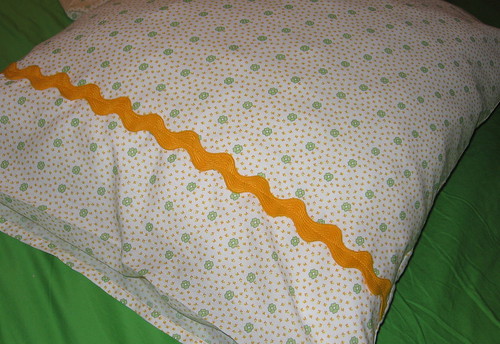
Except... I was at the fabric market and I couldn't find any plain white fabric that I felt was suitable for a pillowcase. So I got this cute little flowery print for 1€ per meter and figured it would do quite nicely. Then I got home and working on the pillowcases and decided they were too plain and needed some giant yellow rick rack to jazz them up. Everything can be made better with rick rack, seriously. So I showed my darling pillowcases to Martijn when he got home and he said "Those are too cute to cover up." The result was some lovely pillowcases, but not the pillowcases we needed!
Click read more for a quick tutorial. I like these because they've got a little flap on them so the pillow stays in securely and doesn't fall out the end!
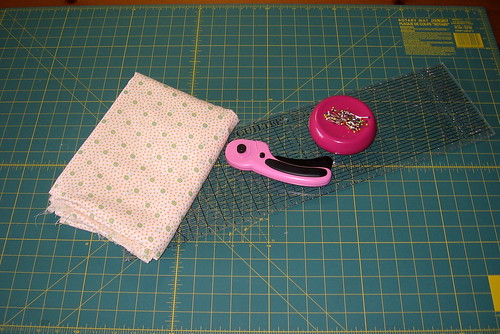
Step 1: Gather up your tools and material!
You will need:
21" of 60 inch wide material per pillow case, trim of your choice, and thread. I hate cutting stuff with scissors, so I've also got my rotary cutter, mat, and ruler.
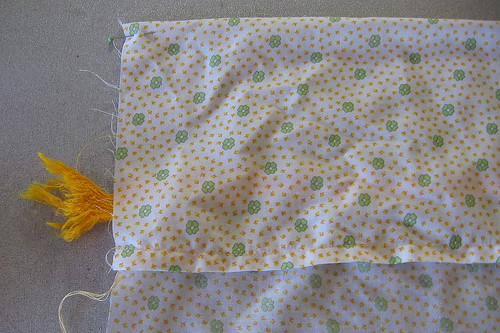
Step 2: Cut a piece of fabric 21" long.

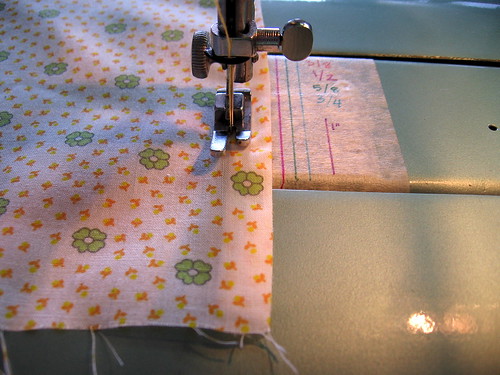
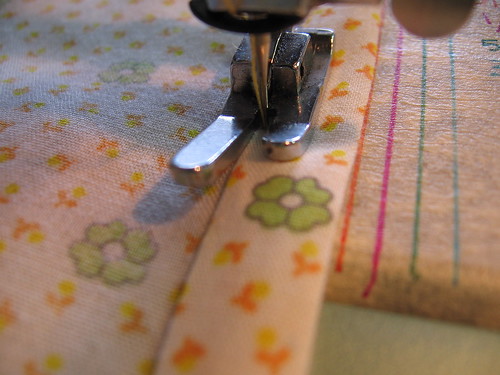
Step 3: On the short ends of the fabric, stitch a 3/8" baste. This is your fold mark for the hem.
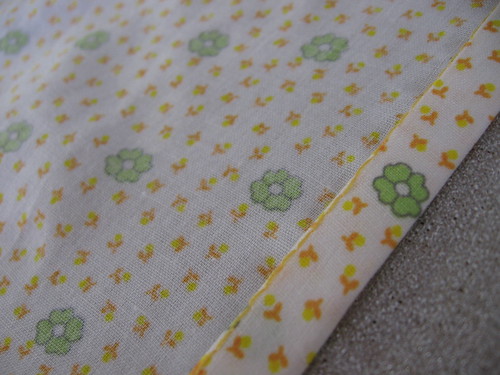
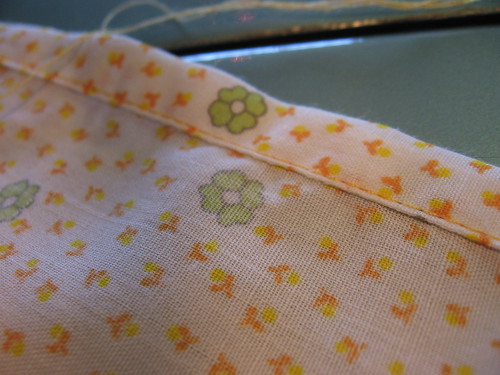
Step 4: Turn up the hem along your baste and press.

Step 5: Turn it up again (to hide the raw edge) and press. Do this on both edges.
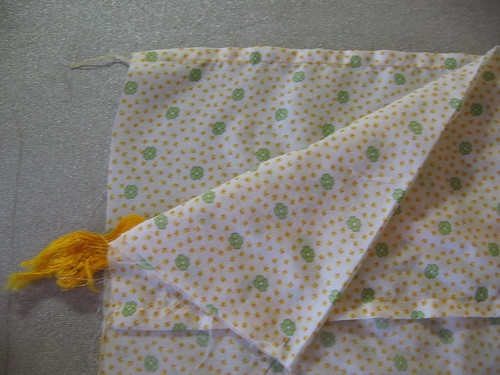
Step 6: With the wrong side up, fold one of your "hem" edges over 6" and press. This is just a marker line, so go ahead and unfold it so you can hem the edges as shown in the next steps. This will also be the upside of your pillowcase.

Step 7: Now onto the fun part!
I like to line up the edge of the hem to the inside edge of the sewing machine. Stitch the hem.
Step 8: Repeat on the other end.
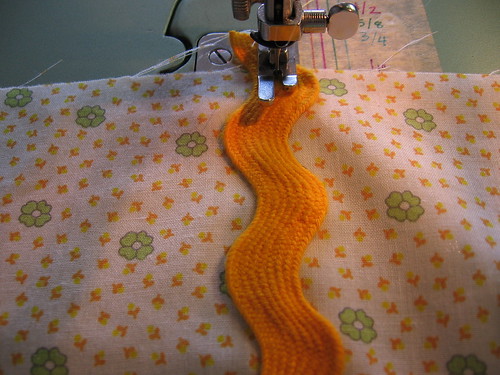
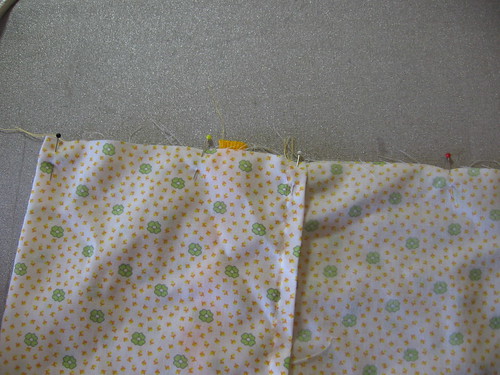
Step 9: Measure 4 inches down from the fold line you made in step 6. Pin your trim there.

Step 10: Attach the trim to the pillowcase. Depending on what you use you can machine stitch it or attach it by hand.
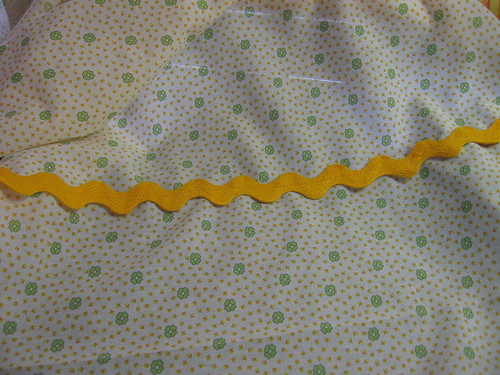
Step 11: Okay, now your trim is attached. Admire your handy work and carry on to step 12!
Step 12: Fold the big flap back down on your press line.
Step 13: Match your hem edges, right sides together.
Step 14: Pin the sides together. Note that the big flap is folded down and is right side out. The rest of the pillowcase is right sides together.
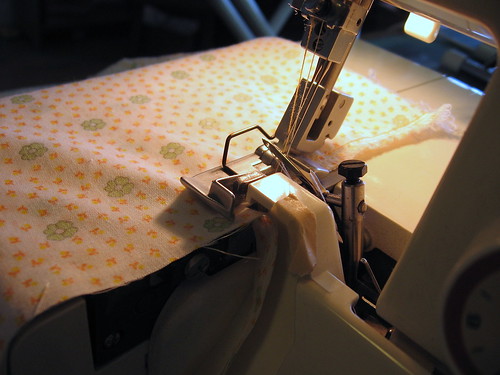
Step 15: Stitch up the side seams with your overlocker. You could do this with a regular sewing machine, but this gives a nice finish to the seams and will chop off the extra dangling trim you see in previous pictures.
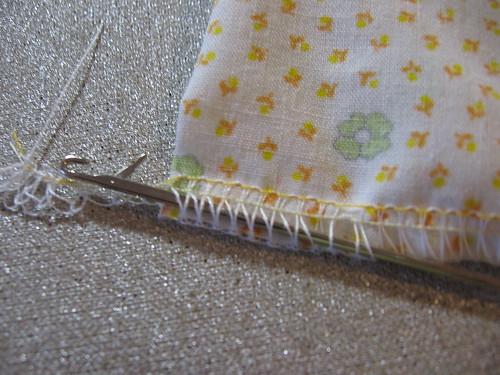
Step 16: Pull your loose threads back using a nifty hook tool or a needle with a big eye. Turn your case right side out and press.
Put your pillow in the case. You can tuck the pillow under the flap.
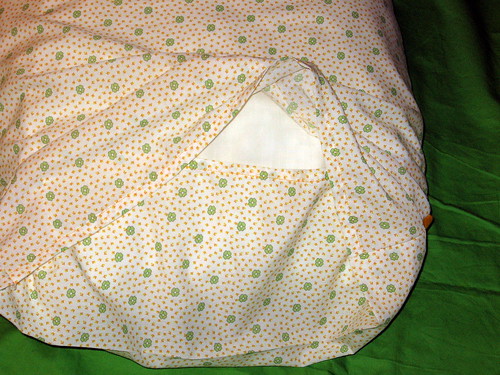
That's it! I have since made the aforementioned white "inner" pillowcases using the same method minus the trim and I really like how they turned out.
P.S. I used Greenie to make these since they pre-dated my magical orange sewing machine find.
*****
I'm participating in Mrs. Matlock's Alphabe-Thursday! Click the link below to see what other precious things people have posted about.


11 comments:
Greenie is in the house!
What a great tutorial. I was right with you until the overlocker/serger thing-y step.
I'm thinking these would be fun gifts for little girls for Christmas. I've made the plain ones before but not the over-lapping and that looks great!
And I totally, agree with you on the rick-rack. Is there a trick to keep all the edges from folding up on the rick-rack? That's the only thing I don't like about using it!
Thanks for a great conclusion to Alphabe-Thursday's letter "P"!
A+ and a special pass to help the Home Ec teacher for the week.
Hmmm.... wonder if they even call them Home Ec teachers anymore?
I love the rick rack on the pillow cases. They are really neat. I've never seen pillowcases with that little flap. It seems like such a good idea. I wonder why manufacturers don't make those.
If only I had an orange sewing machine, I could make this! :) Very cool.
Your husband is right - too cute to cover!
omgosh, you husband is so right ... those are adorable and i <3 the yellow rick rack!!!
There are soooo many possibilities!
I have not thought about making pillow cases for years I used to make all my own bedding mm must rethink this one thanks
I love the pillow case and now I know who to call when I need some hehehe :)
You are really talented. She sews, she cooks, she takes great pictures, she writes with clarity and often humor. Martijn is very blessed in you. The pillow cases are way cute too.
Thanks for the turorial. Loved it.
It's adorable :)
Post a Comment