
You will need the following:
A scrap of cardboard big enough to make your wreath on (the size is up to you)
A piece of felt large enough to cover the front and back of your cardboard (either match or contrast with the color of your buttons)
A hefty stack of buttons of all sizes
Hot glue gun (I stole my husband's)
A short piece of rick rack or ribbon for the hanger
A pen and something circular to make your wreath shapes
Take your lovely scrap cardboard and trace a circle. The bigger the circle, the bigger your wreath. Cut out your circle with a sharp pair of scissors.
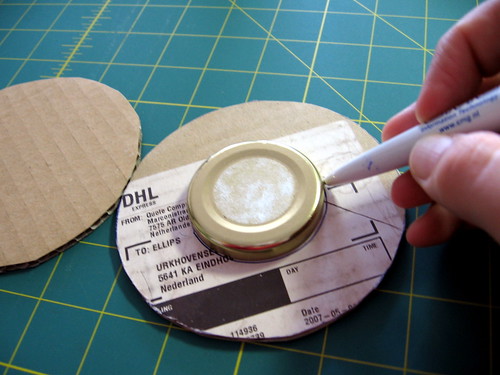
Trace a smaller inside circle. If you make a small inside circle, then the width of your wreath will be thicke. A bigger inside circle will result in a narrower wreath.

Cut out the inner circles, leaving you with nice a nice cardboard donut. Don't eat it, you will be sad because it doesn't taste nice like a real donut ;)
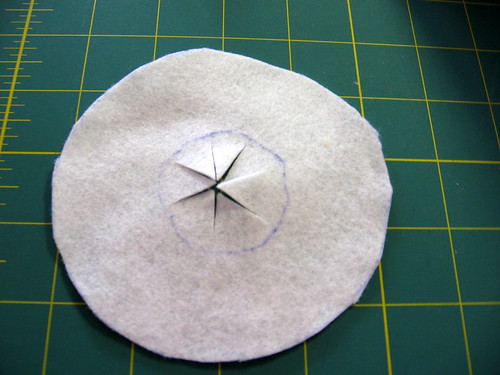
Cut a circle of felt the same size as your cardboard donut. Trace the inner circle and snip the inside like an asterisk up to the edges of the drawn line.
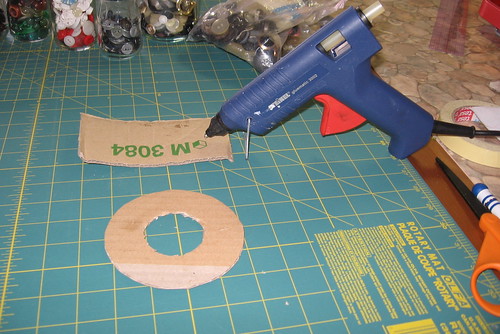
Borrow your husbands hot glue gun and get it nice and toasty.
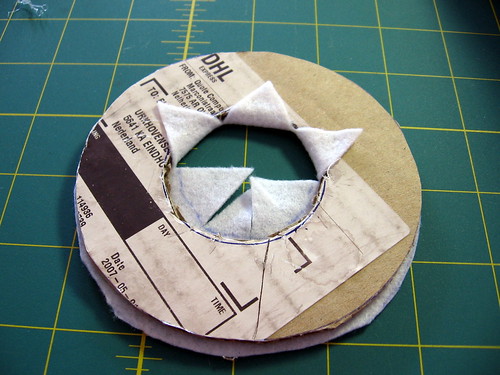
Glue the felt piece to the cardboard, and on the other side fold the cut pieces up and glue them to the back. This will cover the cardboard in the inner hole.

Next, cut another circle of felt, but this time you'll want it bigger than the cardboard donut. Cut out a center hole the same size as the donut hole.
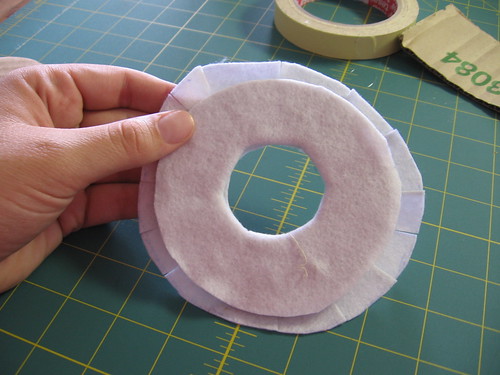
Center the felt over the hole and glue it on the backside. Then clip the felt around the outer edge so you can fold it over.
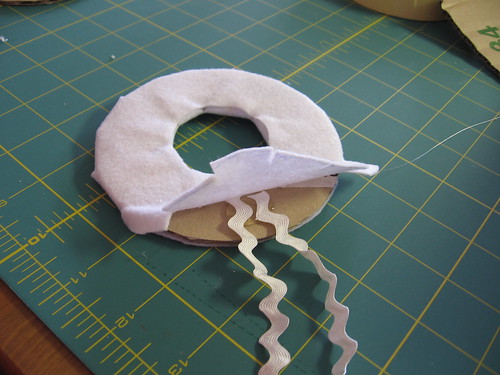
Use a piece of rick rack or ribbon for your hanger and glue it to the back under the felt.
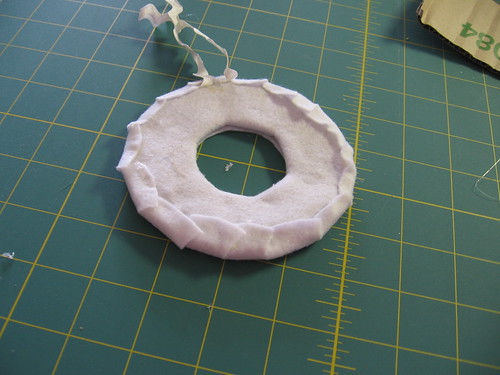
Fold all the snipped bits over and glue them. Your hanger will be in the way a little bit, but you can fold it back up before you glue the buttons on.

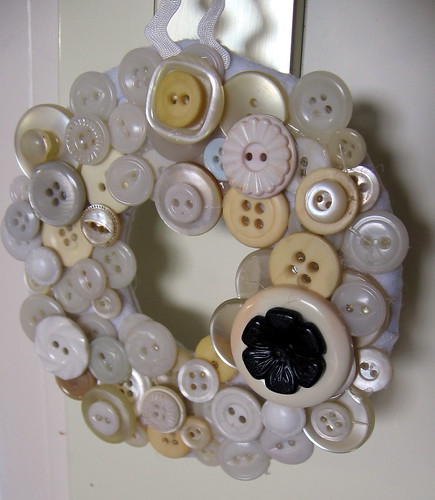
Ogle your nice stack of pretty buttons.

Start gluing on the buttons in a single layer on top of the felt.
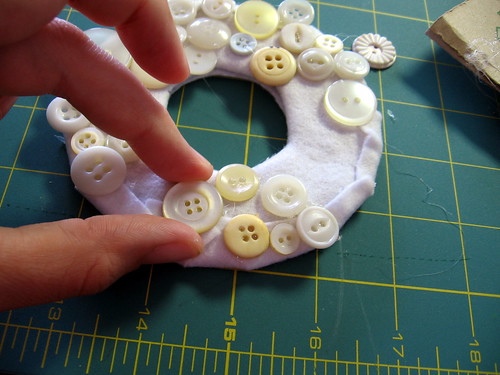
Continue gluing the buttons. If you have gaps, that's okay because you can cover them up with the next layer of buttons.

Hide the spaces by layering the buttons. I did it in a rather haphazard manner, but I think it works for projects like these. The bottom layer is the slightly less interesting buttons, and the upper layers are the cuter ones.

Add any last buttons you wish to complete your wreath and clean up the stray hotglue hairs.


10 comments:
that is too adorable!!
thanks for stopping by! :)
Wonder where all those buttons came from heehee
That is SOOO cute! I love it!
Cute project! Looks great!
Have a great day...so far away!:-)
What a great button wreath! I'm so glad you linked up...others HAVE to see this! ;)
Very pretty! I love it!
This is cute and I love the way you gave step by step.
This is so fun and such a great use of buttons!
Thanks for the tutorial, covering the cardboard with felt gives it such a nice finished look.
I love it...it turned out really cute!
Xazmin
very cool! you were above me in the comments section at SITS!
Post a Comment