Thursday, October 09, 2008
Greenie
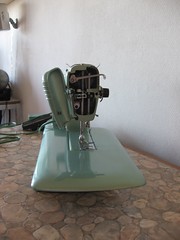
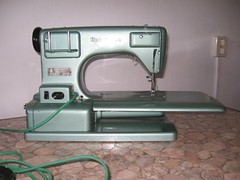
This is Greenie. She's a Husqvarna CL-8 from sometime in the mid 60's. It's a straight stitch only machine, but that just means it's the loveliest looking straight stitch you'll ever see!
I left my sewing machine behind in the US when I moved here, and I'd been really feeling like I needed one... so on Queen's Day* I spotted this machine and knew I had to have it. Martijn asked the woman how much she wanted for it and she said something along the lines of she was asking a lot, and then said 35€. I was so excited to have found such an awesome looking machine that I immediately said "YES." Martijn said we should've tried to haggle it down a little. We should have, but I still think I got it for a steal. Besides, he doesn't like haggling, and I think he wouldn't have tried to get it down anyways (he'll tell you otherwise though).
It had the original accessory box, foot pedal, and (Dutch) users manual. We did end up changing the plug end because the outlet I usually plug it into is grounded and recessed back into the wall and the original plug end wouldn't fit.
*Queen's Day (Koninginnedag in Dutch) is the celebration of the Queen's birthday here in The Netherlands. Everything that can be covered in something orange is and the entire country turns into a giant flea market. There are some good deals to be had if you search enough!
Strange bit of trivia: Queen Beatrix's actual birthday is in January, but she opted to keep the celebration on April 30th (her mother, Queen Juliana's birthday) since the weather is usually more pleasant and conducive to celebrations in April.
Monday, October 06, 2008
Favorite Things Monday
SarahC from Everyday Elegance has invited me to participate in her "My Favorite Things Monday" hosted on her blog! The idea is to post a current "favorite thing" that cheers you up when you're feeling bad.
I did quite a bit of thinking on this and decided sock monkeys fit the bill. I mean, how can you be annoyed or down when you're looking at a sock monkey? Even when you're trying to stitch on their limbs and they're flopping all over, you can't really help but smile.
I give you some examples:
I did quite a bit of thinking on this and decided sock monkeys fit the bill. I mean, how can you be annoyed or down when you're looking at a sock monkey? Even when you're trying to stitch on their limbs and they're flopping all over, you can't really help but smile.
I give you some examples:
Sunday, October 05, 2008
Menu Plan Monday- October 5, 2008
click the banner and "Menu Plan Monday" for more menu planning ideas
Last week:
We liked the Crockpot Chicken and Brown Rice but I felt like there was just a little -something- missing. It was better with a little added salt, but I might try to season the rice differently next time I make it.
I didn't make the Low Carb Pizza because I contracted the plague and was having a nasty med reaction and just didn't feel like messing with it.
This week:
Lucky me for having a husband that likes to cook! He's making us pork medallions and witlof salad tonight, and sometime this week he's going to be making a red cabbage stew because we're having people over. The rest is up to me though ;) All of these recipes are new because I have a serious backlog of "untested" in my recipe file. I might as well test them and see if they're good enough to add to the "tried and true" file!
Stuffed Peppers Casserole- This is interesting because it's -like- stuffed peppers without actually -needing- whole peppers. I have a freezer full of sliced, so this is perfect. I'll let everyone know how we like it next week.
Whole Chicken in the Slowcooker- I've got a chicken in the freezer that I'm going to use to make this. The reviews say to use less oil, and maybe marinate the bird for a couple hours before starting to cook so I'll give it a go.
Spicy Sauteed Chickpeas, Beef, & Cilantro- I think I've got everything on hand for it except Spike Seasoning... which I have no idea what is so I will be making some substitutions I'm sure.
Cornmeal Crusted Catfish- This looks simple enough that I won't foul it up!
Saturday, October 04, 2008
DS Lite Restoration Project 2008
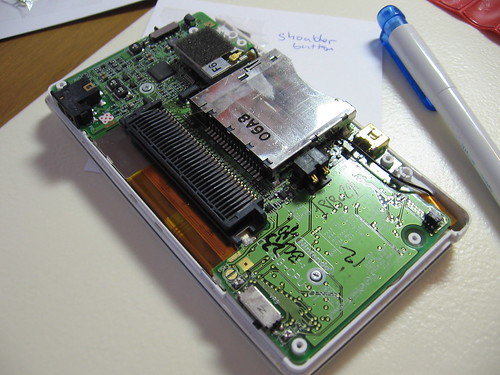
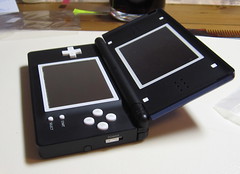
Did you ever wonder what the inside of a Nintendo DS looks like?
If you said no, then I'm sorry. If you said yes, then HERE YOU GO!
A few weeks ago, we were laying in bed and Martijn let out a mournful groan. DISASTER HAD STRUCK! His DS hinge had given up the ghost.
Apparently, this is a known weak spot on the DS and if you Google "cracked hinge" all of the search results on the first page (minus one) are about the hinge problem!
Martijn bought his DS lite right when they came out in 2006, so it was very very much out of warranty. Sending it to Nintendo for a hefty (almost 90€) fee was really not looking like a nice plan, and getting a new one for €149 was sortof out of the question and silly, since otherwise the device was still in good shape. We hemmed and hawed about it and decided the most economical solution was going to be to replace the housing.
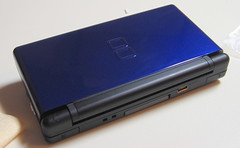
Now the tricky part was deciding what color he wanted his new DS to be. You can get new housings in a bunch of different (and non-factory) colors. After much deliberation I ordered the blue and black "full replacement housing" from dealextreme.com for him. Since it was a shiny metallic paint and we were worried about scratches, we also ordered a clear snap on case to go over it (more on that later). A set of new button pads and a triwing screwdriver so we could get into the thing finished out our order.
When I've ordered from dealextreme.com in the past, I usually have forgotten what was in my order by the time it gets to me because the shipping from China is SO SLOW. Since we were worried about the opposite hinge on his DS, I loaned him MY snap-on clear case. Luckily, the order only took a week and a half, which is really breakneck speed compared to how slow some of my previous orders were.
Now some words of wisdom:
Martijn said (very diplomatically I might add) "It was a lengthy, and at times, stressful project. In the end I'm glad to say the result was more than satisfactory."
To see more of thecarnage process, you can check out the flickr set here.
If you said no, then I'm sorry. If you said yes, then HERE YOU GO!
A few weeks ago, we were laying in bed and Martijn let out a mournful groan. DISASTER HAD STRUCK! His DS hinge had given up the ghost.
Apparently, this is a known weak spot on the DS and if you Google "cracked hinge" all of the search results on the first page (minus one) are about the hinge problem!
Martijn bought his DS lite right when they came out in 2006, so it was very very much out of warranty. Sending it to Nintendo for a hefty (almost 90€) fee was really not looking like a nice plan, and getting a new one for €149 was sortof out of the question and silly, since otherwise the device was still in good shape. We hemmed and hawed about it and decided the most economical solution was going to be to replace the housing.
Now the tricky part was deciding what color he wanted his new DS to be. You can get new housings in a bunch of different (and non-factory) colors. After much deliberation I ordered the blue and black "full replacement housing" from dealextreme.com for him. Since it was a shiny metallic paint and we were worried about scratches, we also ordered a clear snap on case to go over it (more on that later). A set of new button pads and a triwing screwdriver so we could get into the thing finished out our order.
When I've ordered from dealextreme.com in the past, I usually have forgotten what was in my order by the time it gets to me because the shipping from China is SO SLOW. Since we were worried about the opposite hinge on his DS, I loaned him MY snap-on clear case. Luckily, the order only took a week and a half, which is really breakneck speed compared to how slow some of my previous orders were.
Now some words of wisdom:
- This is a very fiddly project.
- There will likely be swearing involved.
- If you do this you will probably want to know how to use a soldering iron in case you break one of your shoulder buttons off.
- If you forget to install the power and volume buttons, you will have to take things completely apart again to put them back in.
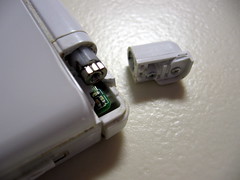
- Same with if you forget to take the little metal nut that the battery cover screws into out of your old housing.
- The awesome transparent case you bought to snap on your DS so it won't get scratched might not actually fit an aftermarket housing.
- The replacement buttons that come with many of the replacement housings aren't as good as the originals so you might just decide to reuse the old ones.
- And the old screen covers.
- I really recommend reading the reviews of the housings (or replacement shells) at gbatemp.net. Here's a link.
Martijn said (very diplomatically I might add) "It was a lengthy, and at times, stressful project. In the end I'm glad to say the result was more than satisfactory."
To see more of the
Friday, October 03, 2008
Peanut Butter Banana Bread
My intention for this blog was not for it to be a recipe blog (which is what it looks like at the moment). However, recipes are easy posts (well, easy in that most of the ones I've posted lately are recipes I've already posted elsewhere *coughs*) and I'm all about easy. I hope that in the next few weeks very soon I'll have something more substantial (and interesting) to read about, but right now I'm going to spam you with more recipes!
Peanut Butter Banana Bread
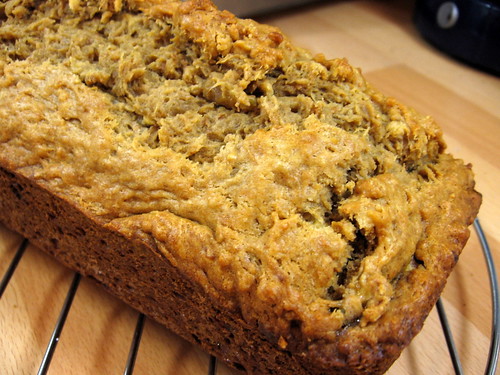
I had some bananas that were on the verge of death, and I'd come across a recipe for Peanut Butter Banana Bread somewhere on the internet... so I thought "why not!?" I was a little wary of the recipe I found, so I made some rather big changes. Here's what I came up with:
Peanut Butter Banana Bread
1 cup flour
3/4 cup whole wheat flour
3 very ripe bananas, mashed
3/4 cup peanut butter
1/4 cup Splenda Brown Sugar (or 1/2 cup of regular brown sugar)
1/4 cup Splenda (or regular sugar)
2 eggs
1 tsp baking soda
3/8 cup vegetable oil
1 tsp vanilla (optional)
Preheat the oven to 325 F (160 C). Grease a large bread loaf pan.
Mix the sugars and oil together. Beat in the eggs. Add the rest of the ingredients and stir together until mixed well. This is a really thick gooey "dough." Pour into the pan and cook for about 25 minutes. Cover with aluminum foil and cook for another 25-35 minutes, or until a toothpick inserted in the center comes out clean.
P.S. Don't forget to put in the baking soda. Really, don't. You will regret it.
Peanut Butter Banana Bread
I had some bananas that were on the verge of death, and I'd come across a recipe for Peanut Butter Banana Bread somewhere on the internet... so I thought "why not!?" I was a little wary of the recipe I found, so I made some rather big changes. Here's what I came up with:
Peanut Butter Banana Bread
1 cup flour
3/4 cup whole wheat flour
3 very ripe bananas, mashed
3/4 cup peanut butter
1/4 cup Splenda Brown Sugar (or 1/2 cup of regular brown sugar)
1/4 cup Splenda (or regular sugar)
2 eggs
1 tsp baking soda
3/8 cup vegetable oil
1 tsp vanilla (optional)
Preheat the oven to 325 F (160 C). Grease a large bread loaf pan.
Mix the sugars and oil together. Beat in the eggs. Add the rest of the ingredients and stir together until mixed well. This is a really thick gooey "dough." Pour into the pan and cook for about 25 minutes. Cover with aluminum foil and cook for another 25-35 minutes, or until a toothpick inserted in the center comes out clean.
P.S. Don't forget to put in the baking soda. Really, don't. You will regret it.
Thursday, October 02, 2008
Vintage Thingie Thursday- Coat Rack!
This weeks Vintage Thingie Thursday is probably more of a "I surpassed vintage about 40 years ago Thingie Thursday."
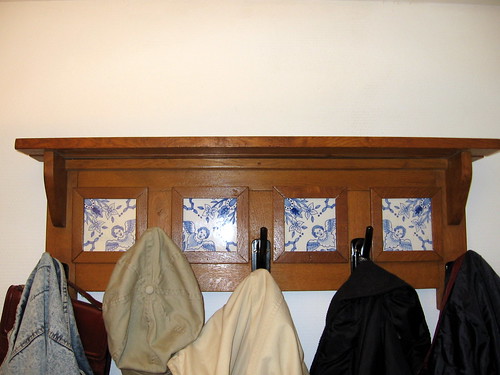
This is the coat rack that was in the garden plot of Martijn's great grandfather. The really neat part about it is the garden plot actually was right by where our apartment building currently stands. The hooks have been replaced at some point during it's life, but it's a neat piece I think.
Any ideas on what to put on top of it? There's only about 12 inches between it and the ceiling and it's 5 inches deep. I'm up for any suggestions, it's a little naked up there!

This is the coat rack that was in the garden plot of Martijn's great grandfather. The really neat part about it is the garden plot actually was right by where our apartment building currently stands. The hooks have been replaced at some point during it's life, but it's a neat piece I think.
Any ideas on what to put on top of it? There's only about 12 inches between it and the ceiling and it's 5 inches deep. I'm up for any suggestions, it's a little naked up there!

Wednesday, October 01, 2008
Curry Chicken Salad with Cashews
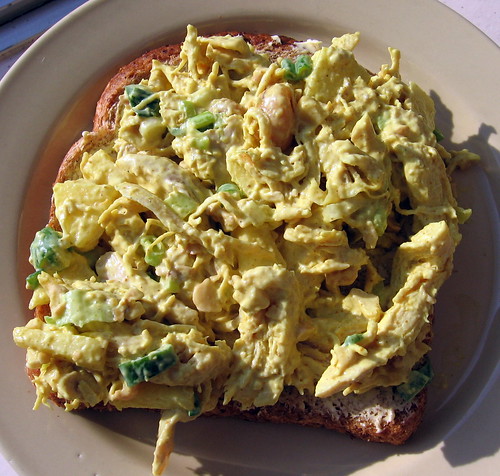
This is another migratory recipe from my livejournal, so sorry if you've seen it before. It's worth a repeat though cause it's delicious. I repeat, delicious.
3 cups cooked chicken, shredded
1 good sized apple, peeled and diced
1/2 cup cashews, chopped
2 green onions, sliced
Dressing:
1/2 cup mayo (use more or less depending on how saucy you like your chicken salad)
2 tbsp apricot jam
2 tsp curry powder
2 tsp red wine vinegar
1 tsp dijon mustard
In a big bowl, combine the chicken, apple, nuts, and onion. Separately, whisk together the dressing ingredients. Pour over the chicken mixture and stir to coat. Chill in the fridge before serving. This is really really good the next day.
A friend said she used cherry jam in this and it was really good too, so I might try that next!
3 cups cooked chicken, shredded
1 good sized apple, peeled and diced
1/2 cup cashews, chopped
2 green onions, sliced
Dressing:
1/2 cup mayo (use more or less depending on how saucy you like your chicken salad)
2 tbsp apricot jam
2 tsp curry powder
2 tsp red wine vinegar
1 tsp dijon mustard
In a big bowl, combine the chicken, apple, nuts, and onion. Separately, whisk together the dressing ingredients. Pour over the chicken mixture and stir to coat. Chill in the fridge before serving. This is really really good the next day.
A friend said she used cherry jam in this and it was really good too, so I might try that next!